The Piano Roll lets you view your transcription in a different way than a traditional score. Instead of notes written on a staff, you see blocks on a grid. This view is very handy for listening to your MIDI, quickly spotting an error, correcting a note, adjusting a duration, or reworking a specific passage.
Generally, the score is more pleasant for reading music. The Piano Roll, on the other hand, is often more practical for correcting MIDI. It was designed to help you save time on the most useful corrections, without forcing you to redo everything manually.
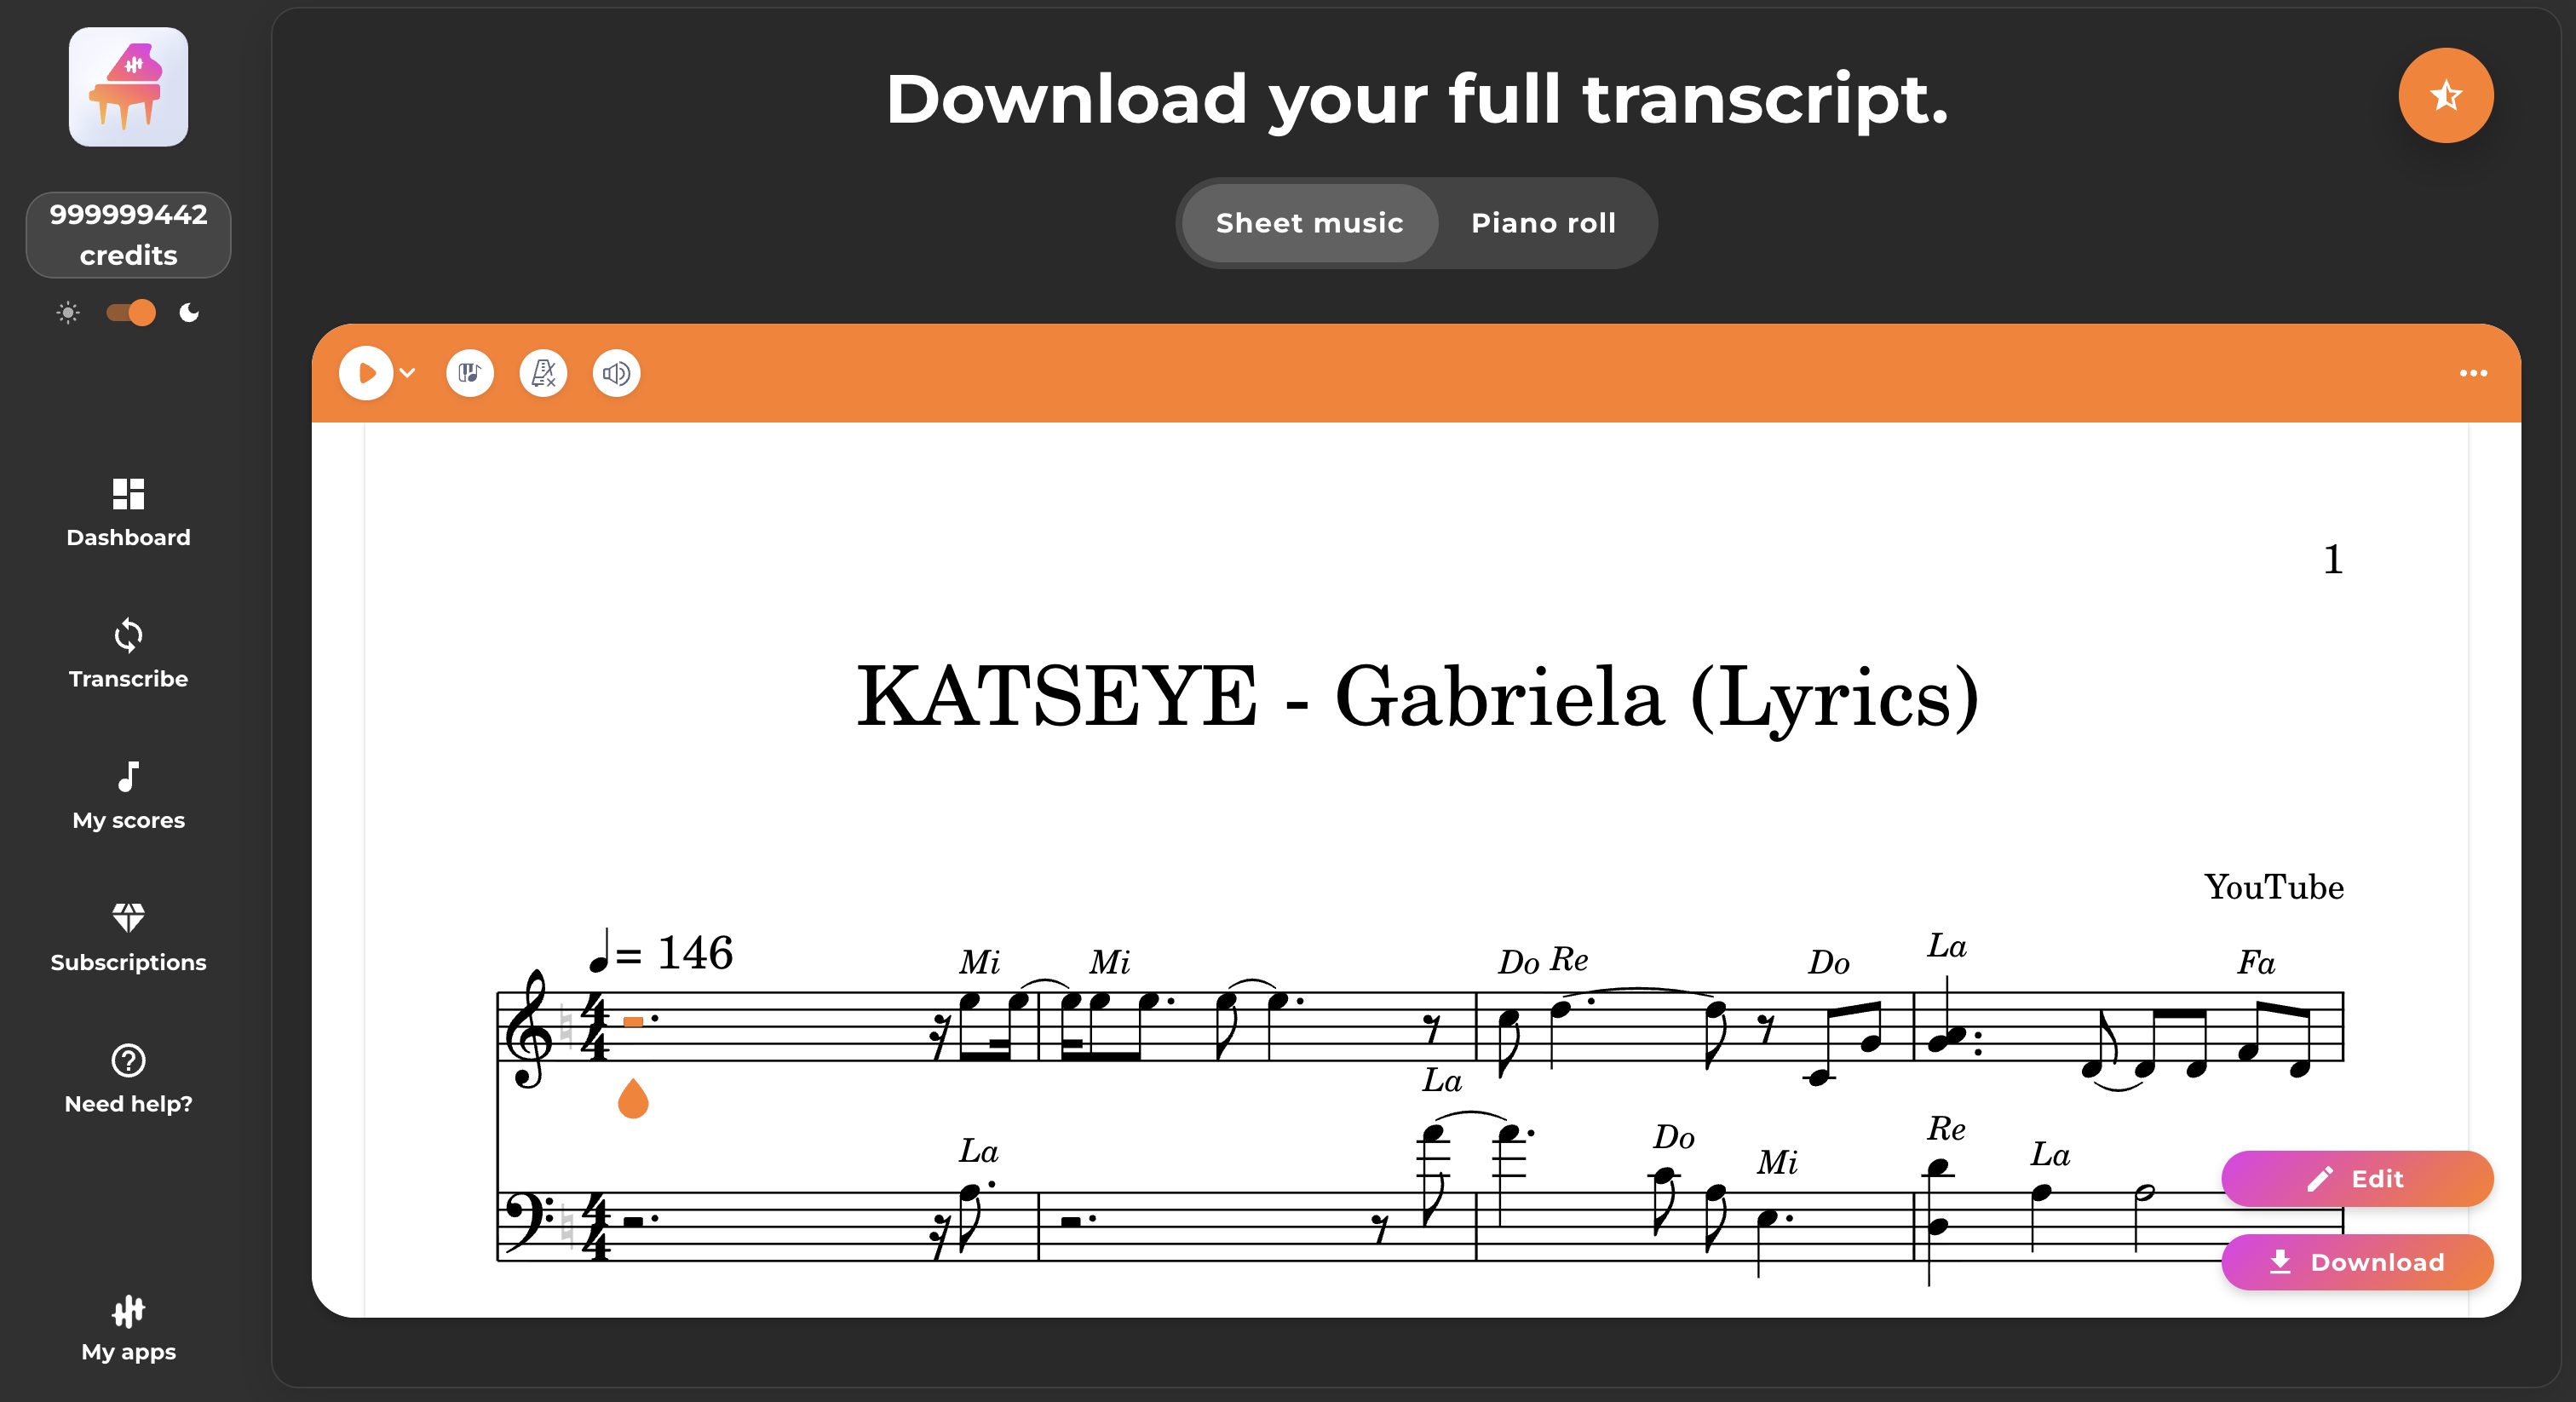
1) Score or Piano Roll: What’s the Difference?
After a conversion, you can view your result in two ways.
The Score view displays the music in the traditional format, with notes written on a staff. This is the most useful view for reading, checking overall readability, or preparing a final download.
The Piano Roll view displays the same music in a visual format, with notes represented as blocks. This view makes it easy to quickly see if a note is too early, too long, too high, too low, or clashes with others.
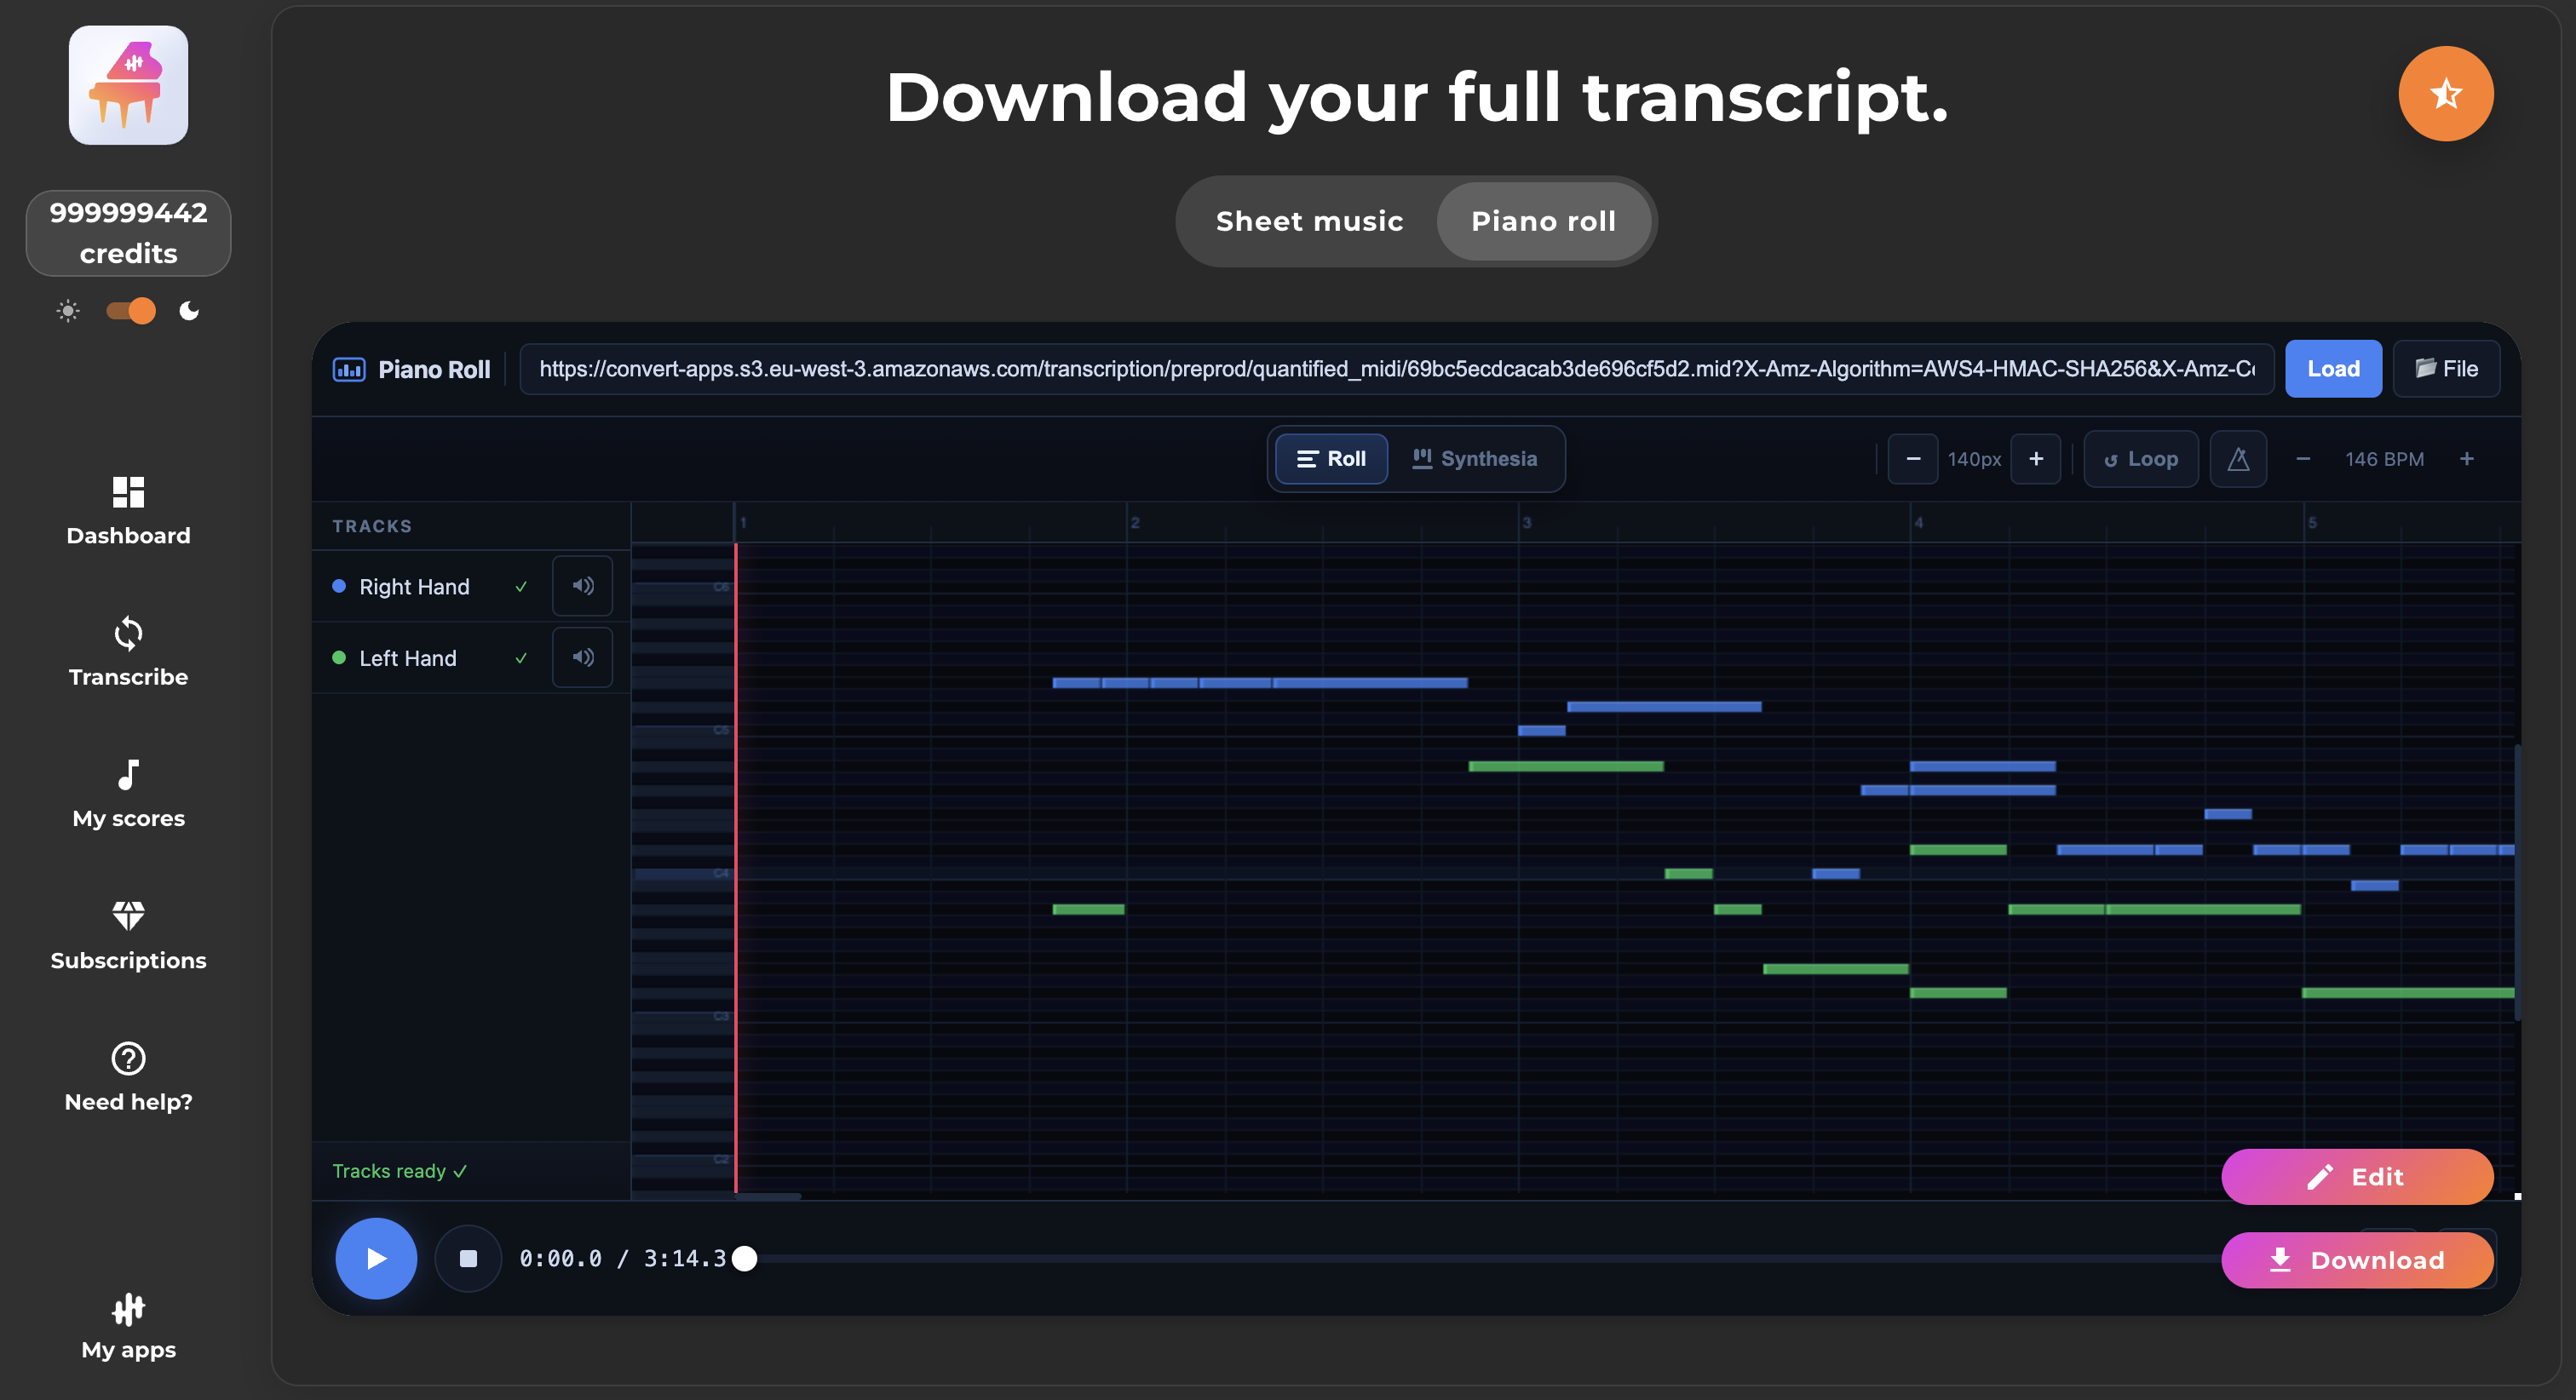
The simplest approach is often to work this way: make your edits in the Piano Roll, then go back to the score to check that you’re happy with the final result.
2) The two Piano Roll views
When you switch to Piano Roll mode, you can use two different views.
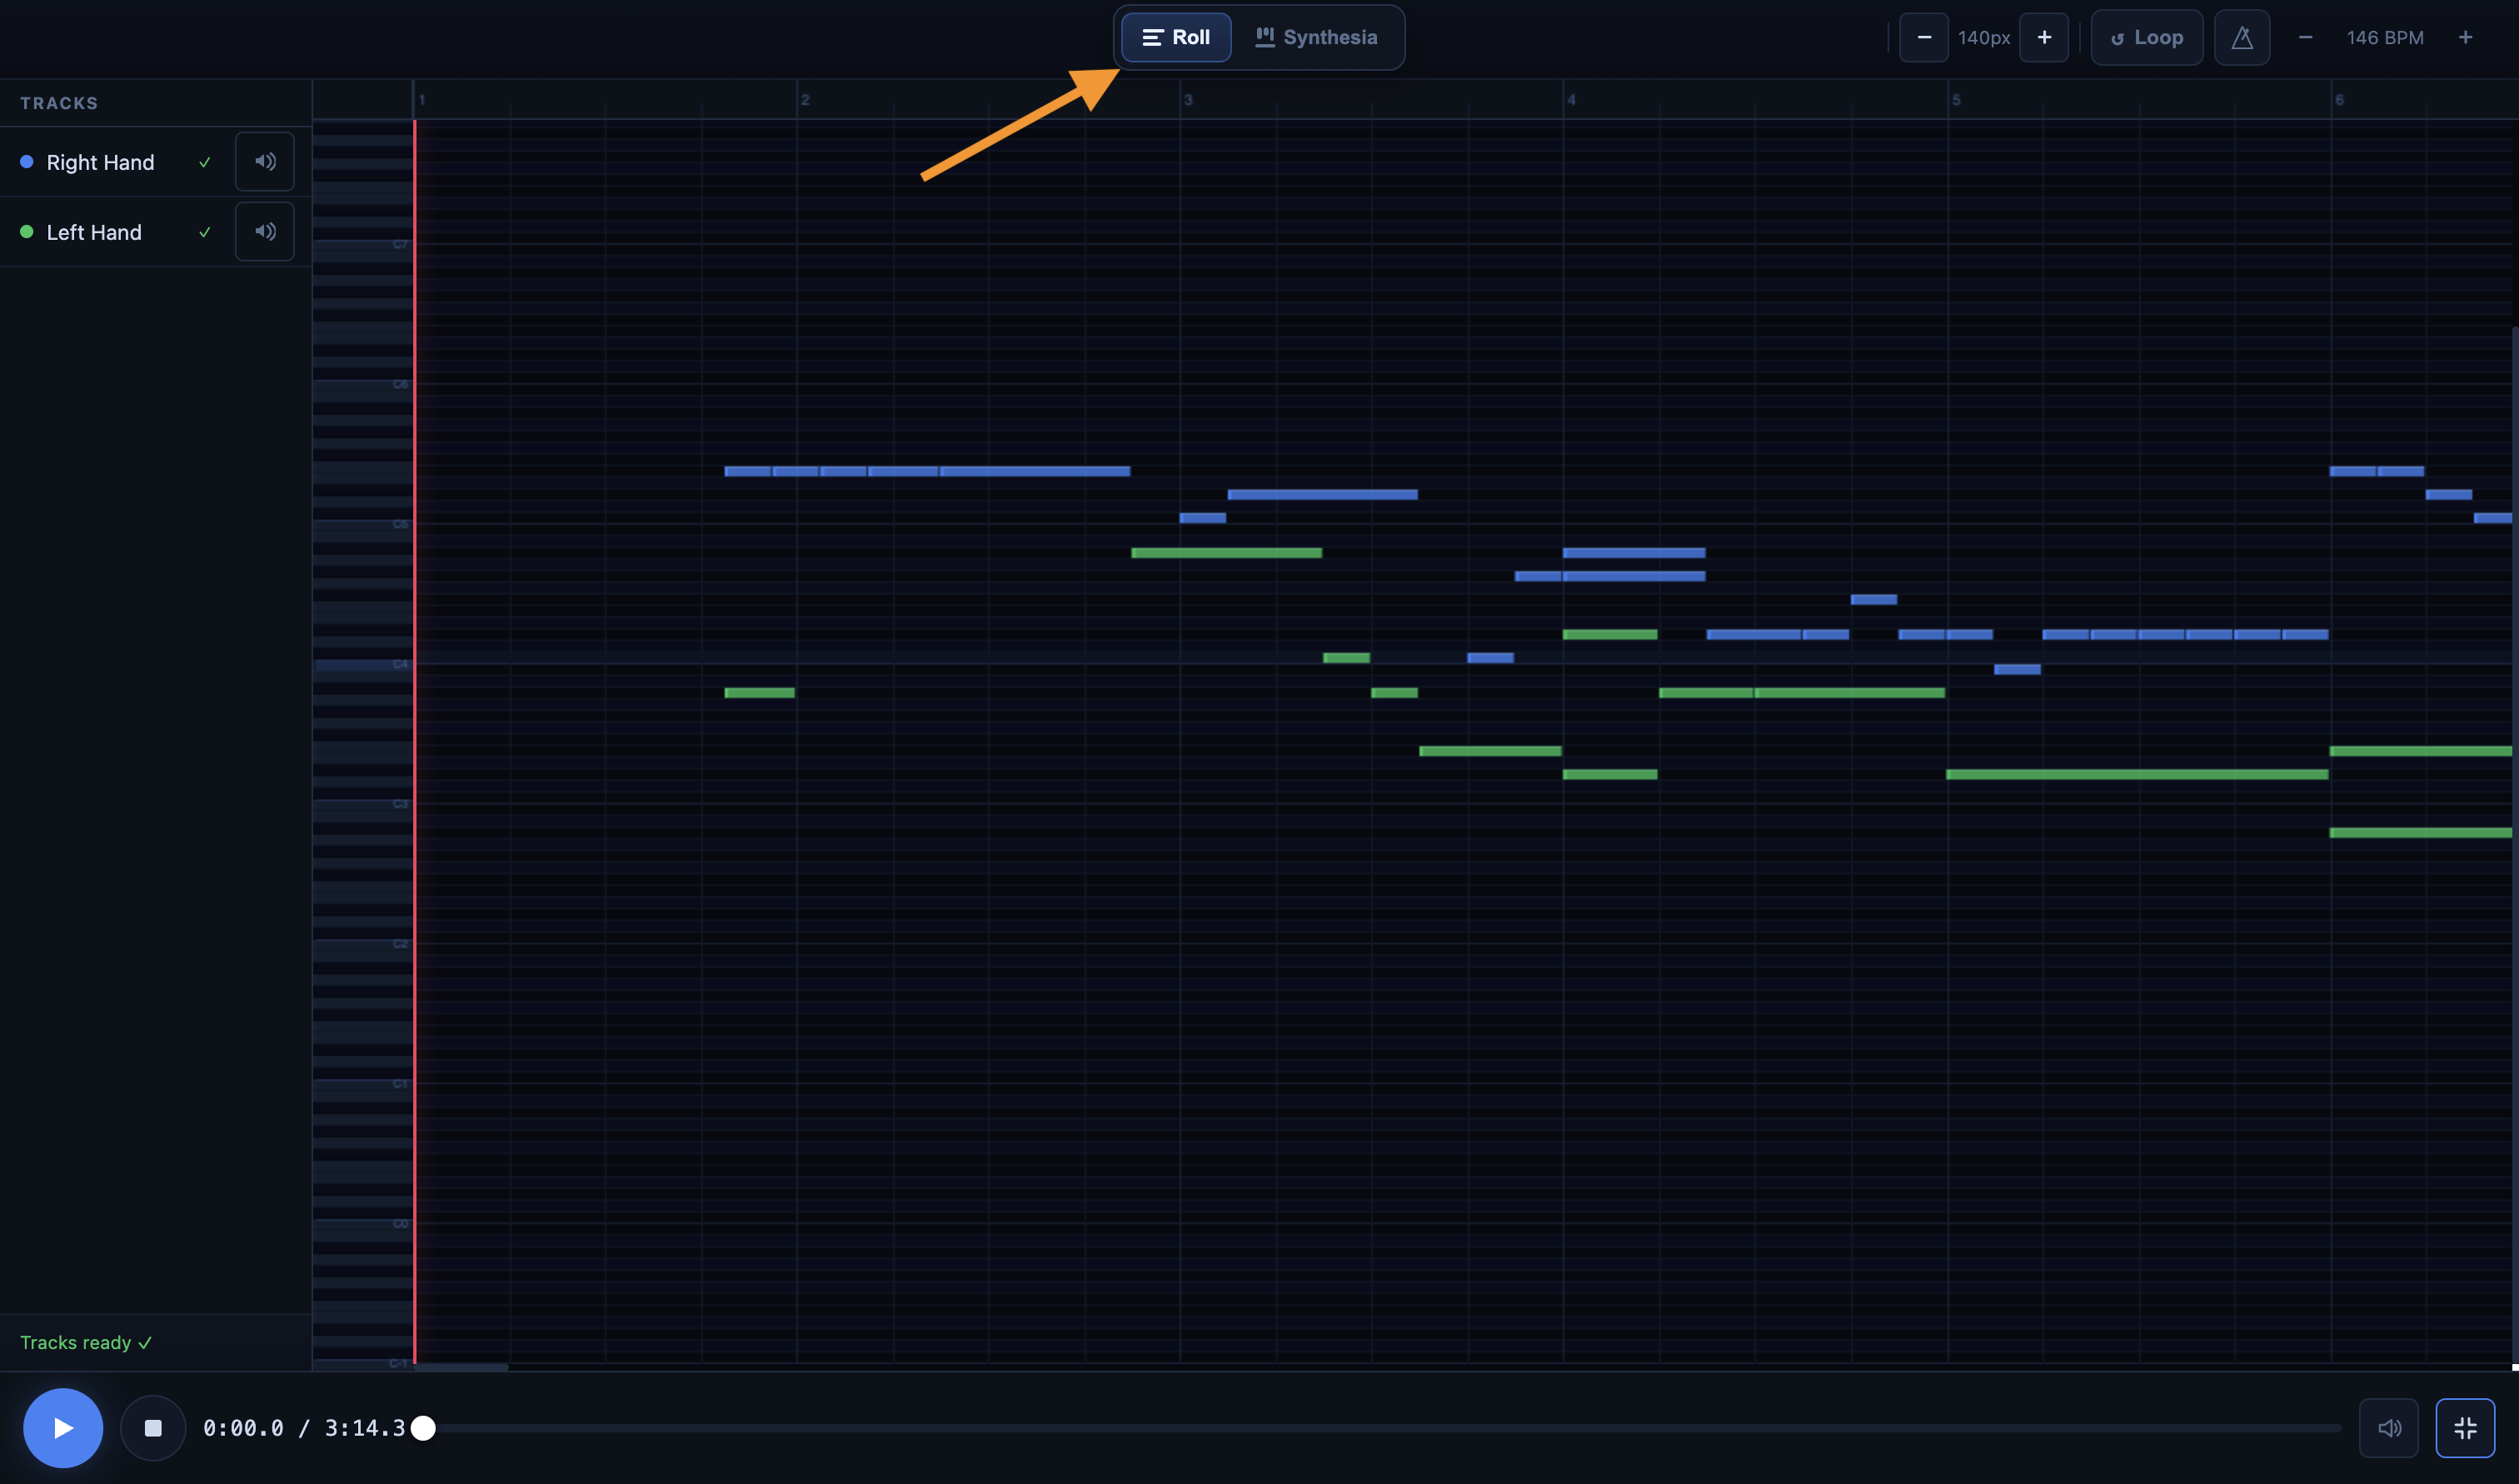
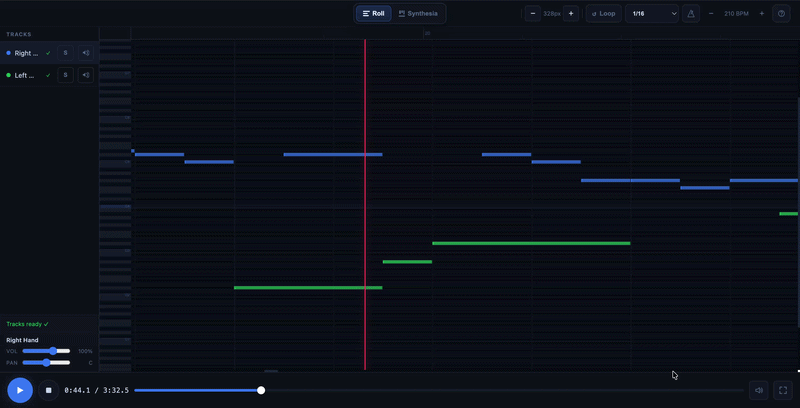
2.1 The Roll View
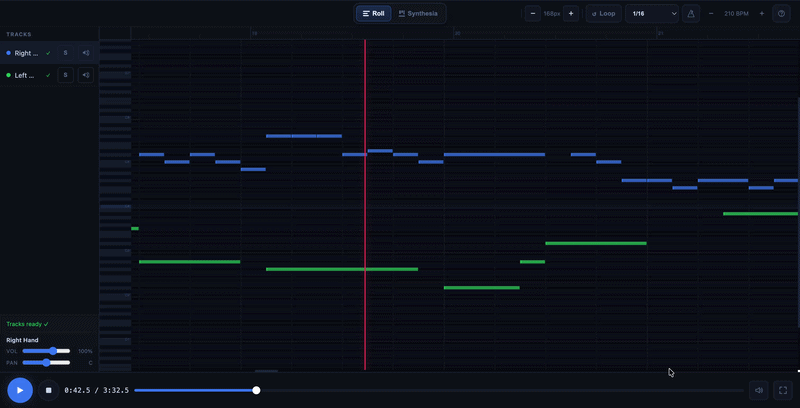
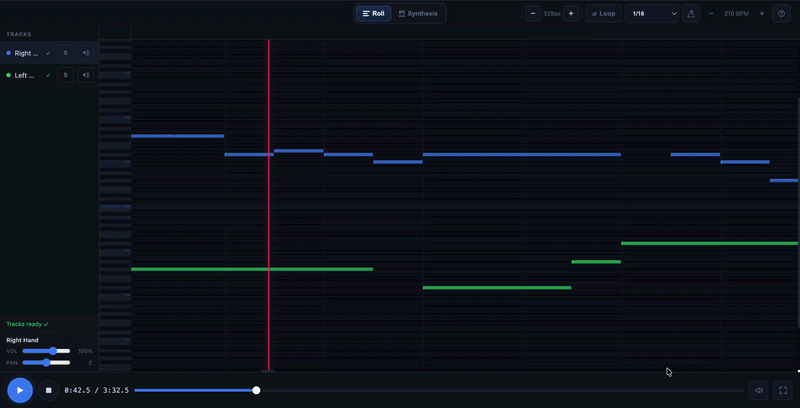
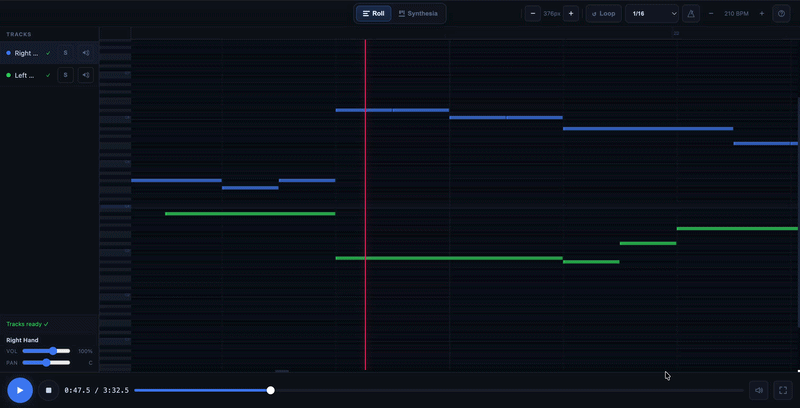
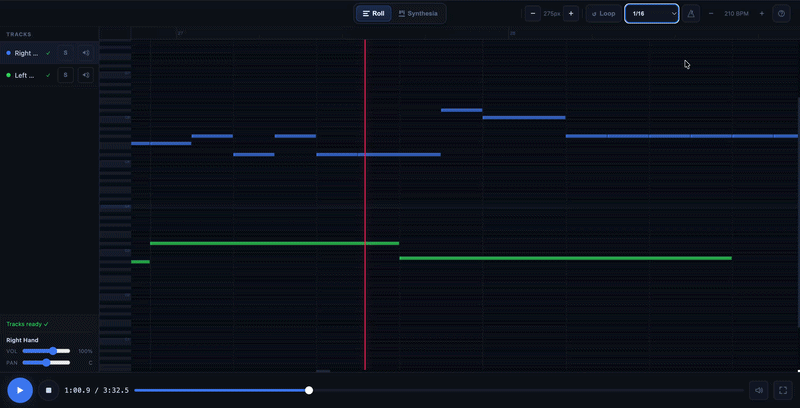
The Roll view is the main editing view. Time flows from left to right. Note pitch runs from bottom to top. Each note appears as a horizontal block. The longer the block, the longer the note lasts.
This is the preferred view for making precise MIDI edits. It’s also the most convenient view for moving a note, changing its duration, adding a note, or deleting one.
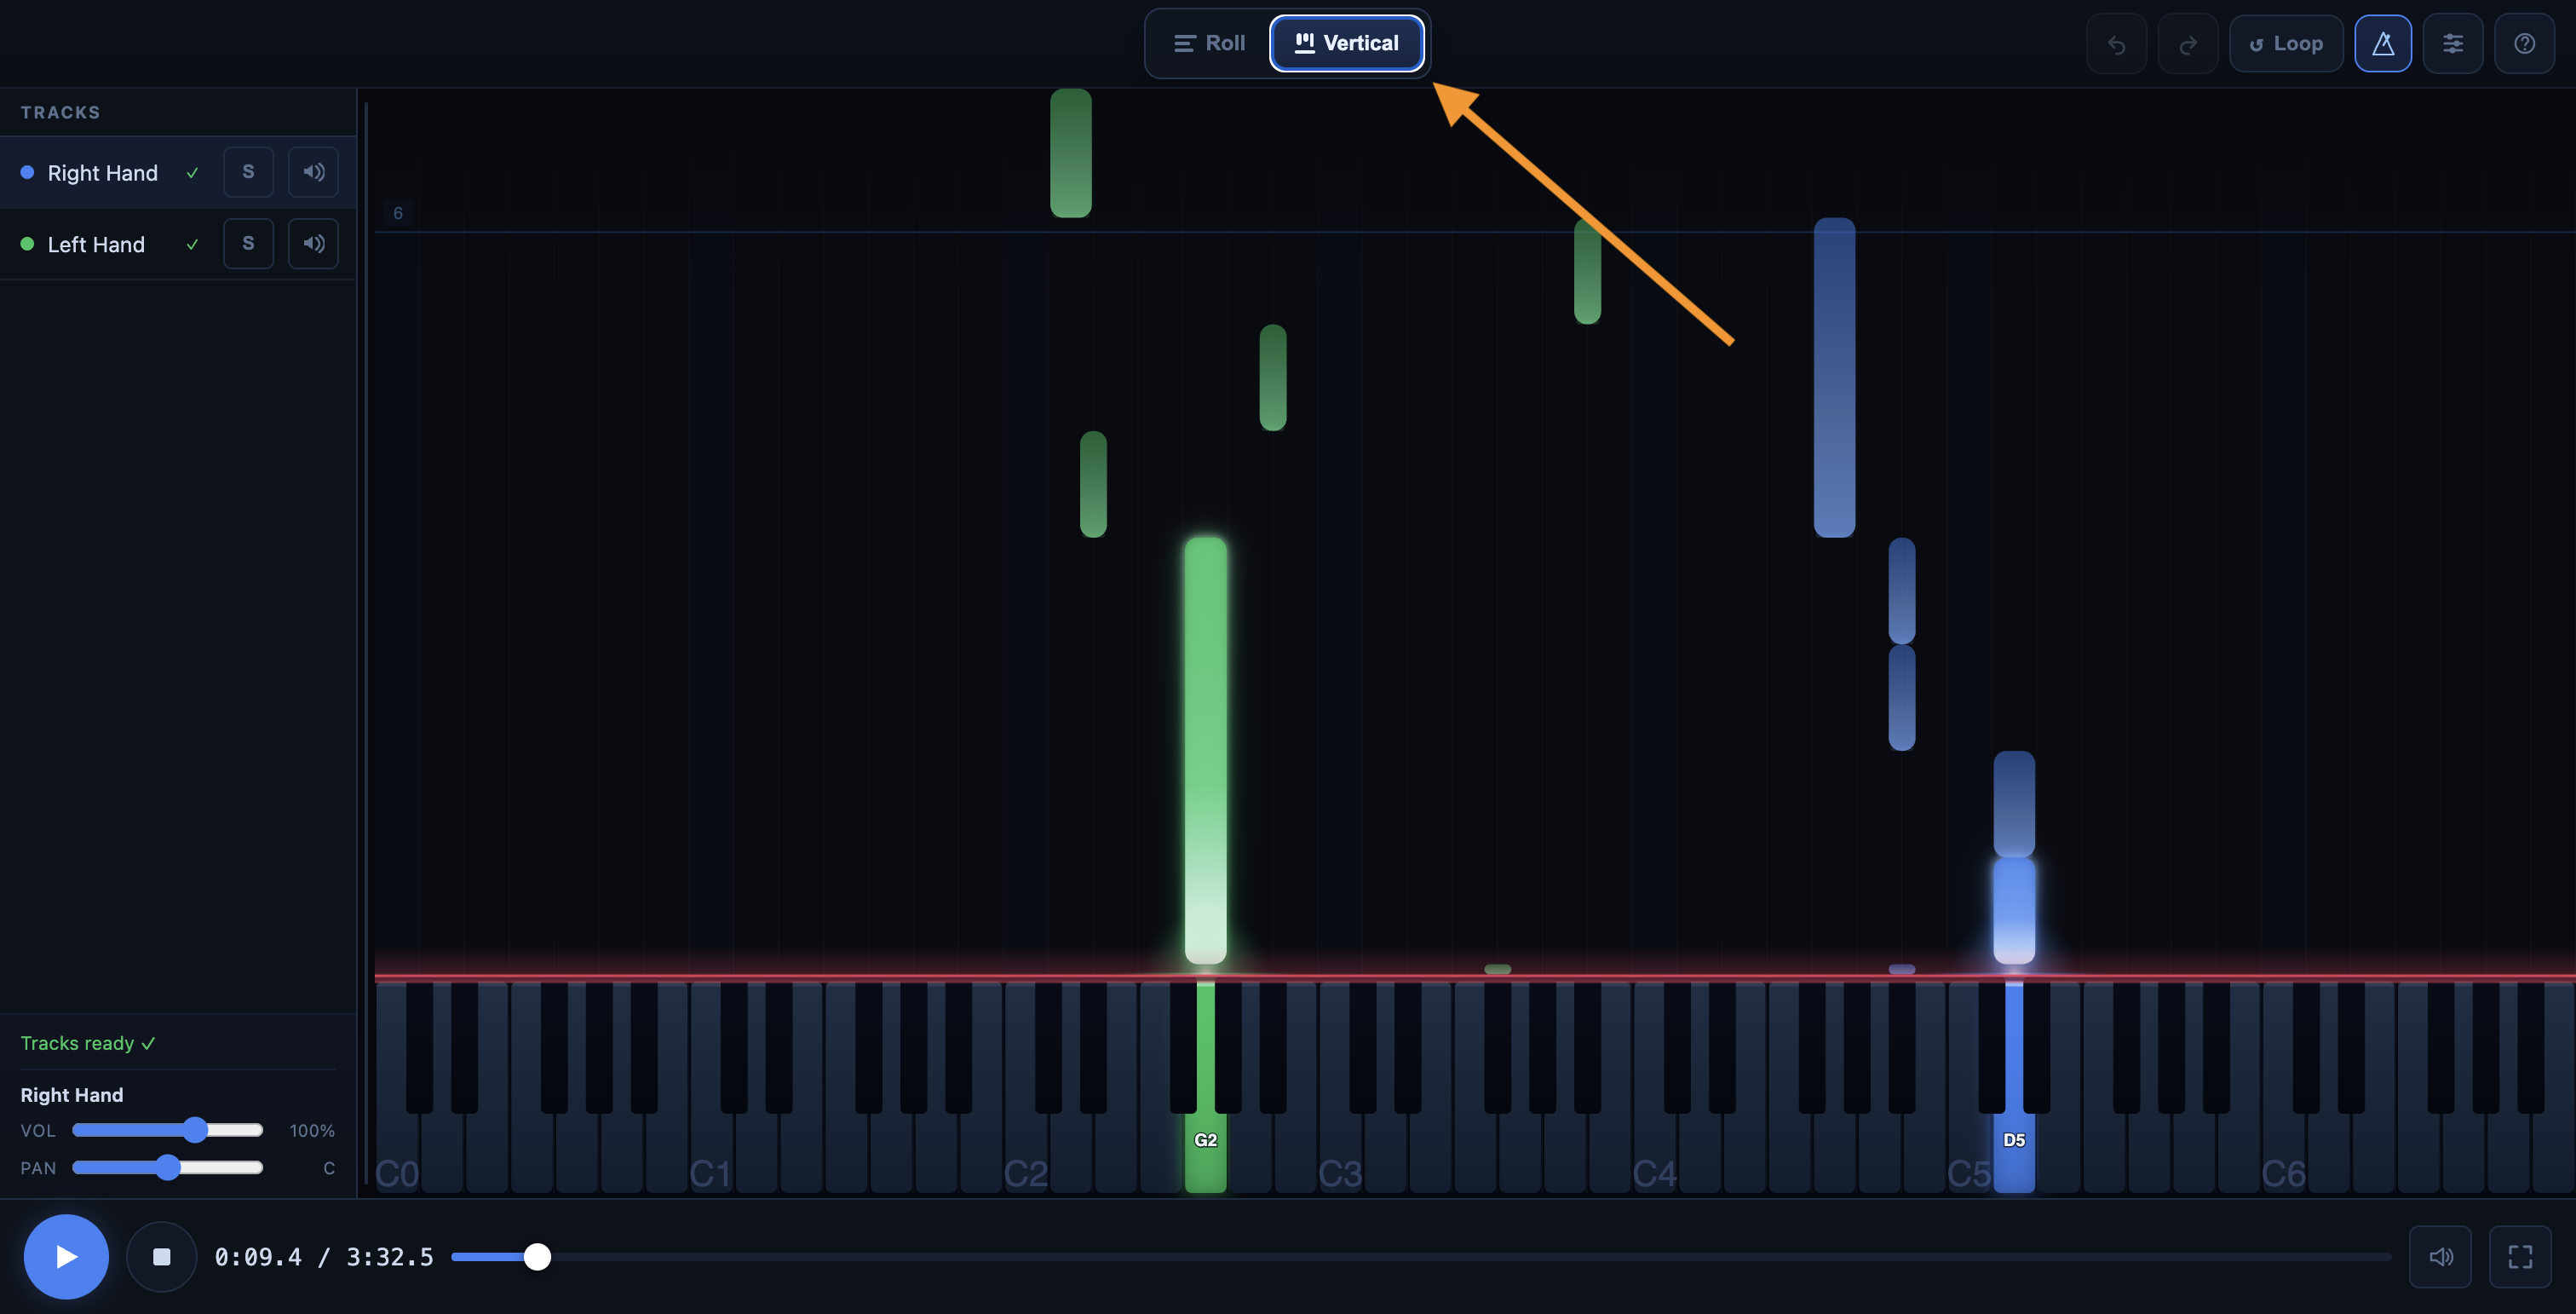
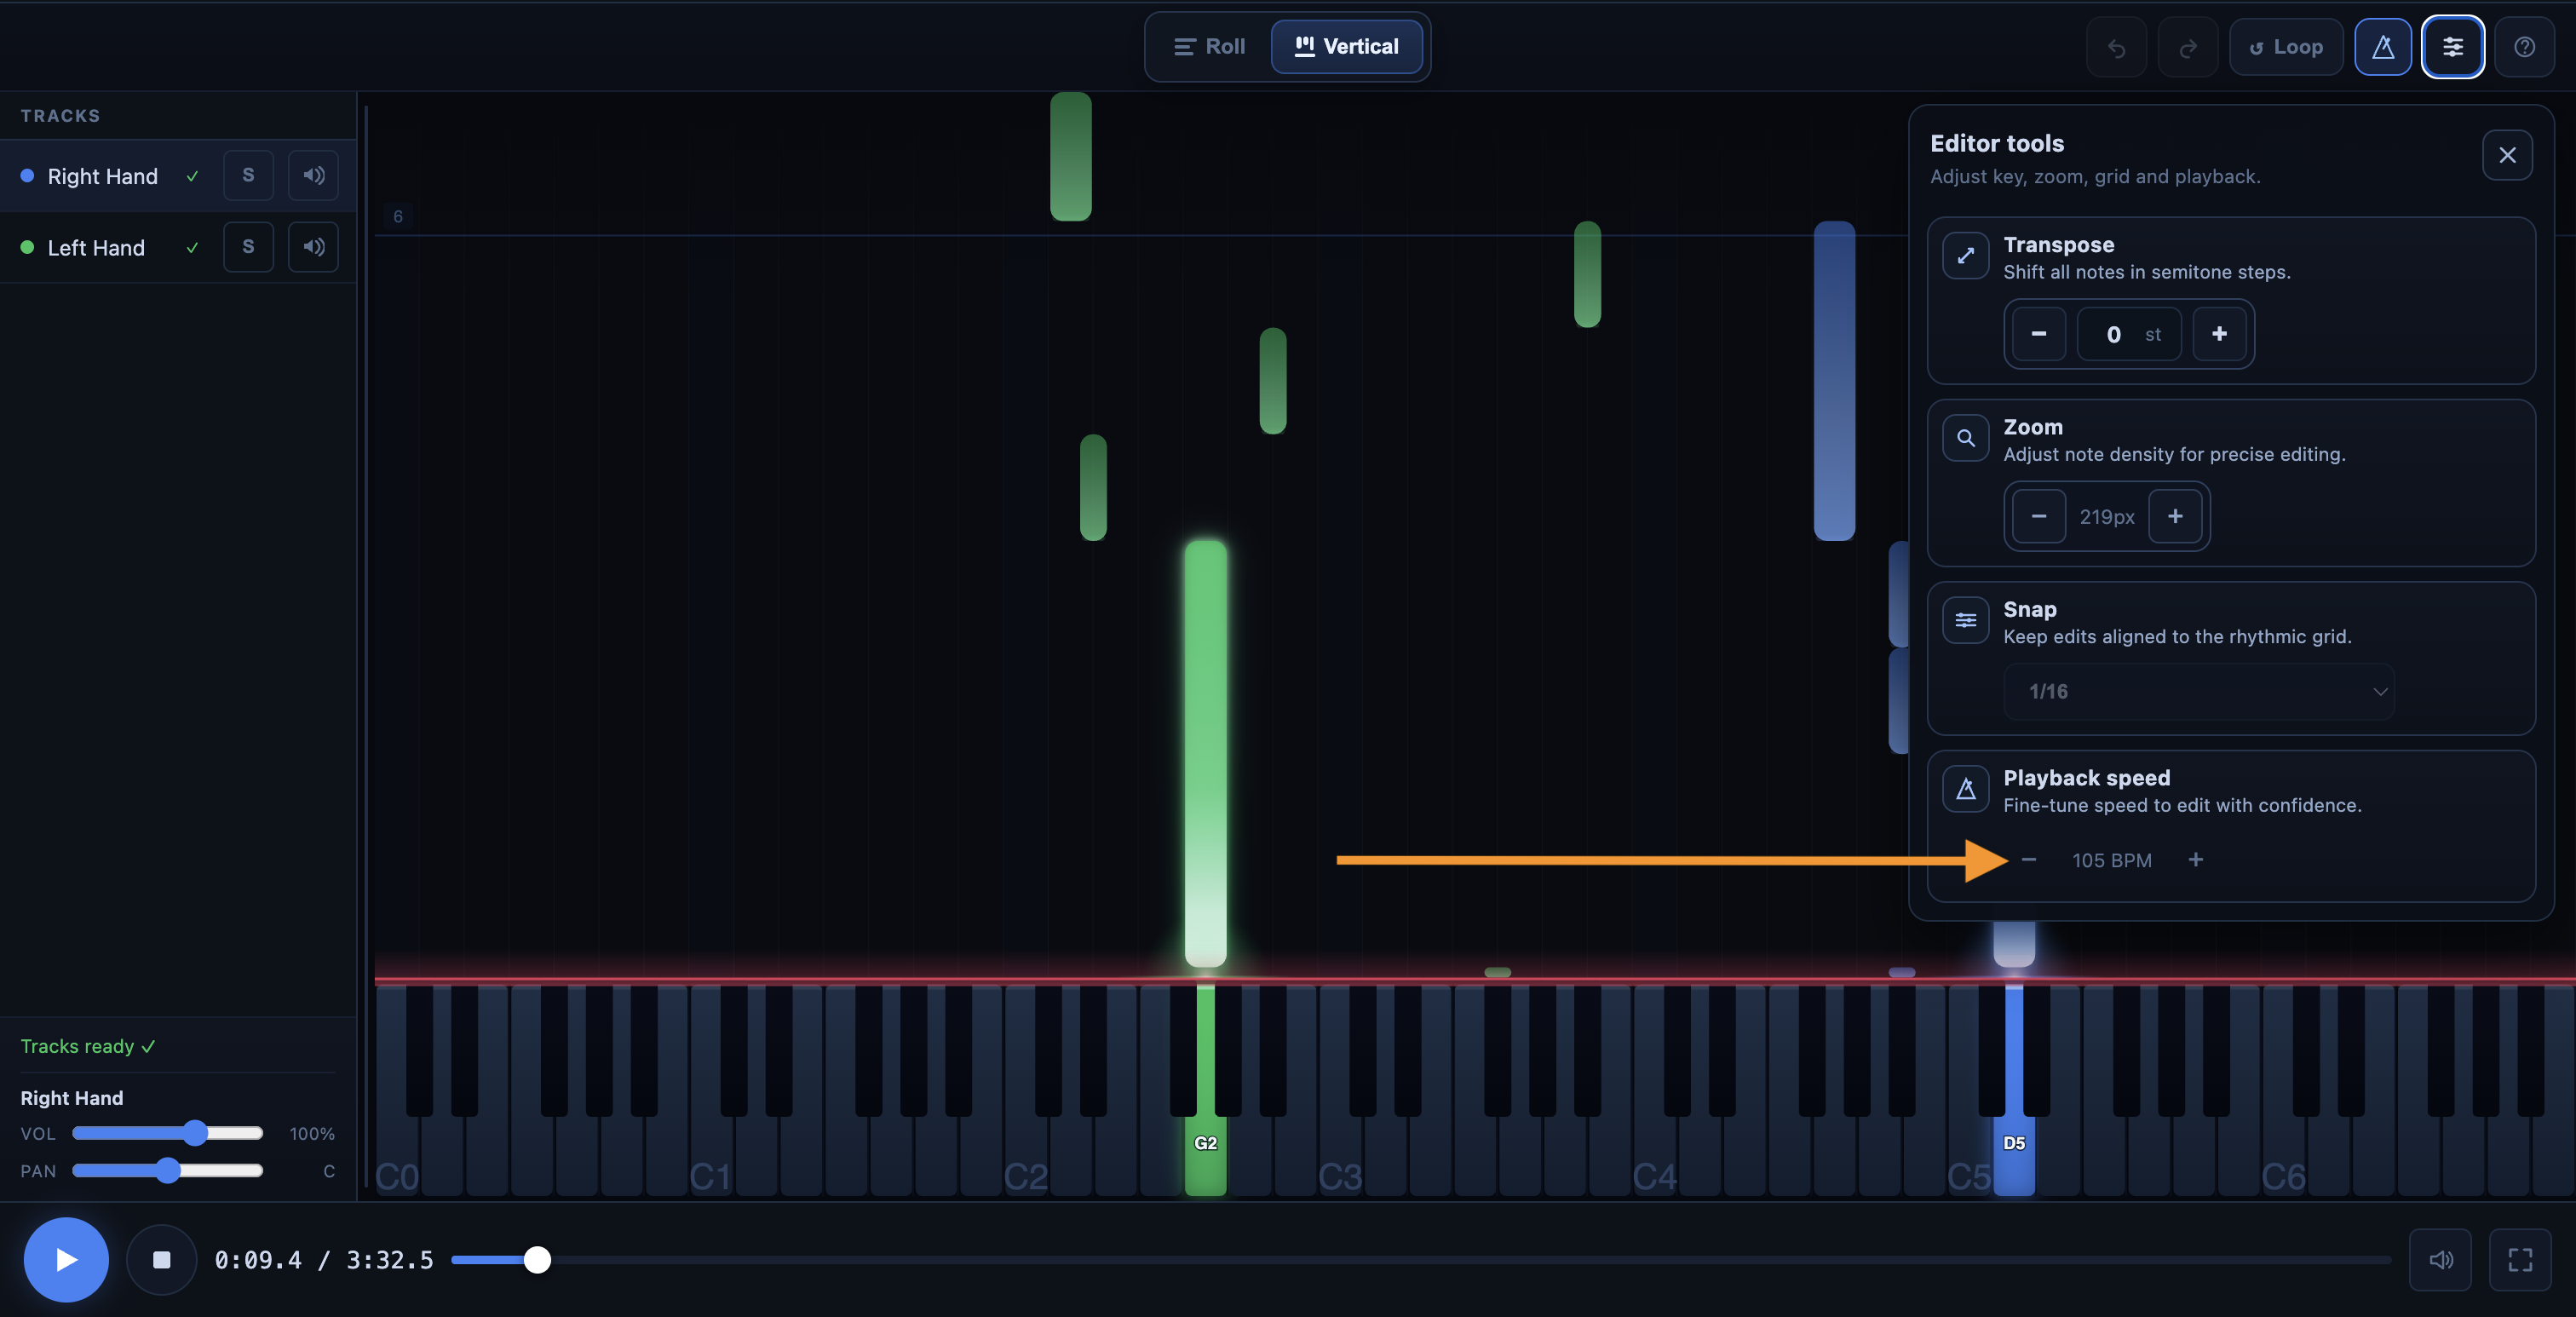
2.2 The Vertical View
The Vertical view is more visual. Notes fall toward a keyboard. It’s useful for following along with the song during playback, quickly locating a passage, or working on a loop.
For editing notes, the Roll view is generally the most efficient. The Vertical view is especially useful for listening, visually following the flow of the song, and focusing on a specific passage.
3) What is the purpose of each main area of the interface?
The Piano Roll includes several simple tools, but each has a specific role. Once you understand what each area is for, it becomes much easier to edit your MIDI cleanly.
3.1 Play / Pause
The Play / Pause button is used to start or stop MIDI playback.
This is the most important tool after making edits. The best practice is almost always the same: restart playback to immediately check if the result is better.
The associated keyboard shortcut is:
- Space: play / pause
3.2 Stop
The Stop button resets playback to the beginning of the track.
It’s useful when you want to start fresh from the beginning, or when you’d rather listen to a section again from the start rather than picking up in the middle.
The associated keyboard shortcut is:
- S: stop / return to the beginning
3.3 Progress Bar
The progress bar lets you navigate through the track.
You can click on it to go directly to a specific section. This is very handy when you want to correct a particular section without restarting playback from the beginning.
When you reposition yourself within the piece, the Piano Roll pauses playback. This prevents annoying timing issues and allows you to start cleanly from the selected point.
3.4 Tempo Control
The tempo control lets you slow down or speed up playback.
This is very useful when a passage is fast, busy, or difficult to hear clearly. Slowing down the playback often makes it easier to spot a rhythm error or a misplaced note. Conversely, speeding up can be useful for quickly checking the overall result.
The Piano Roll allows you to adjust the speed from 0.25× to 2×.
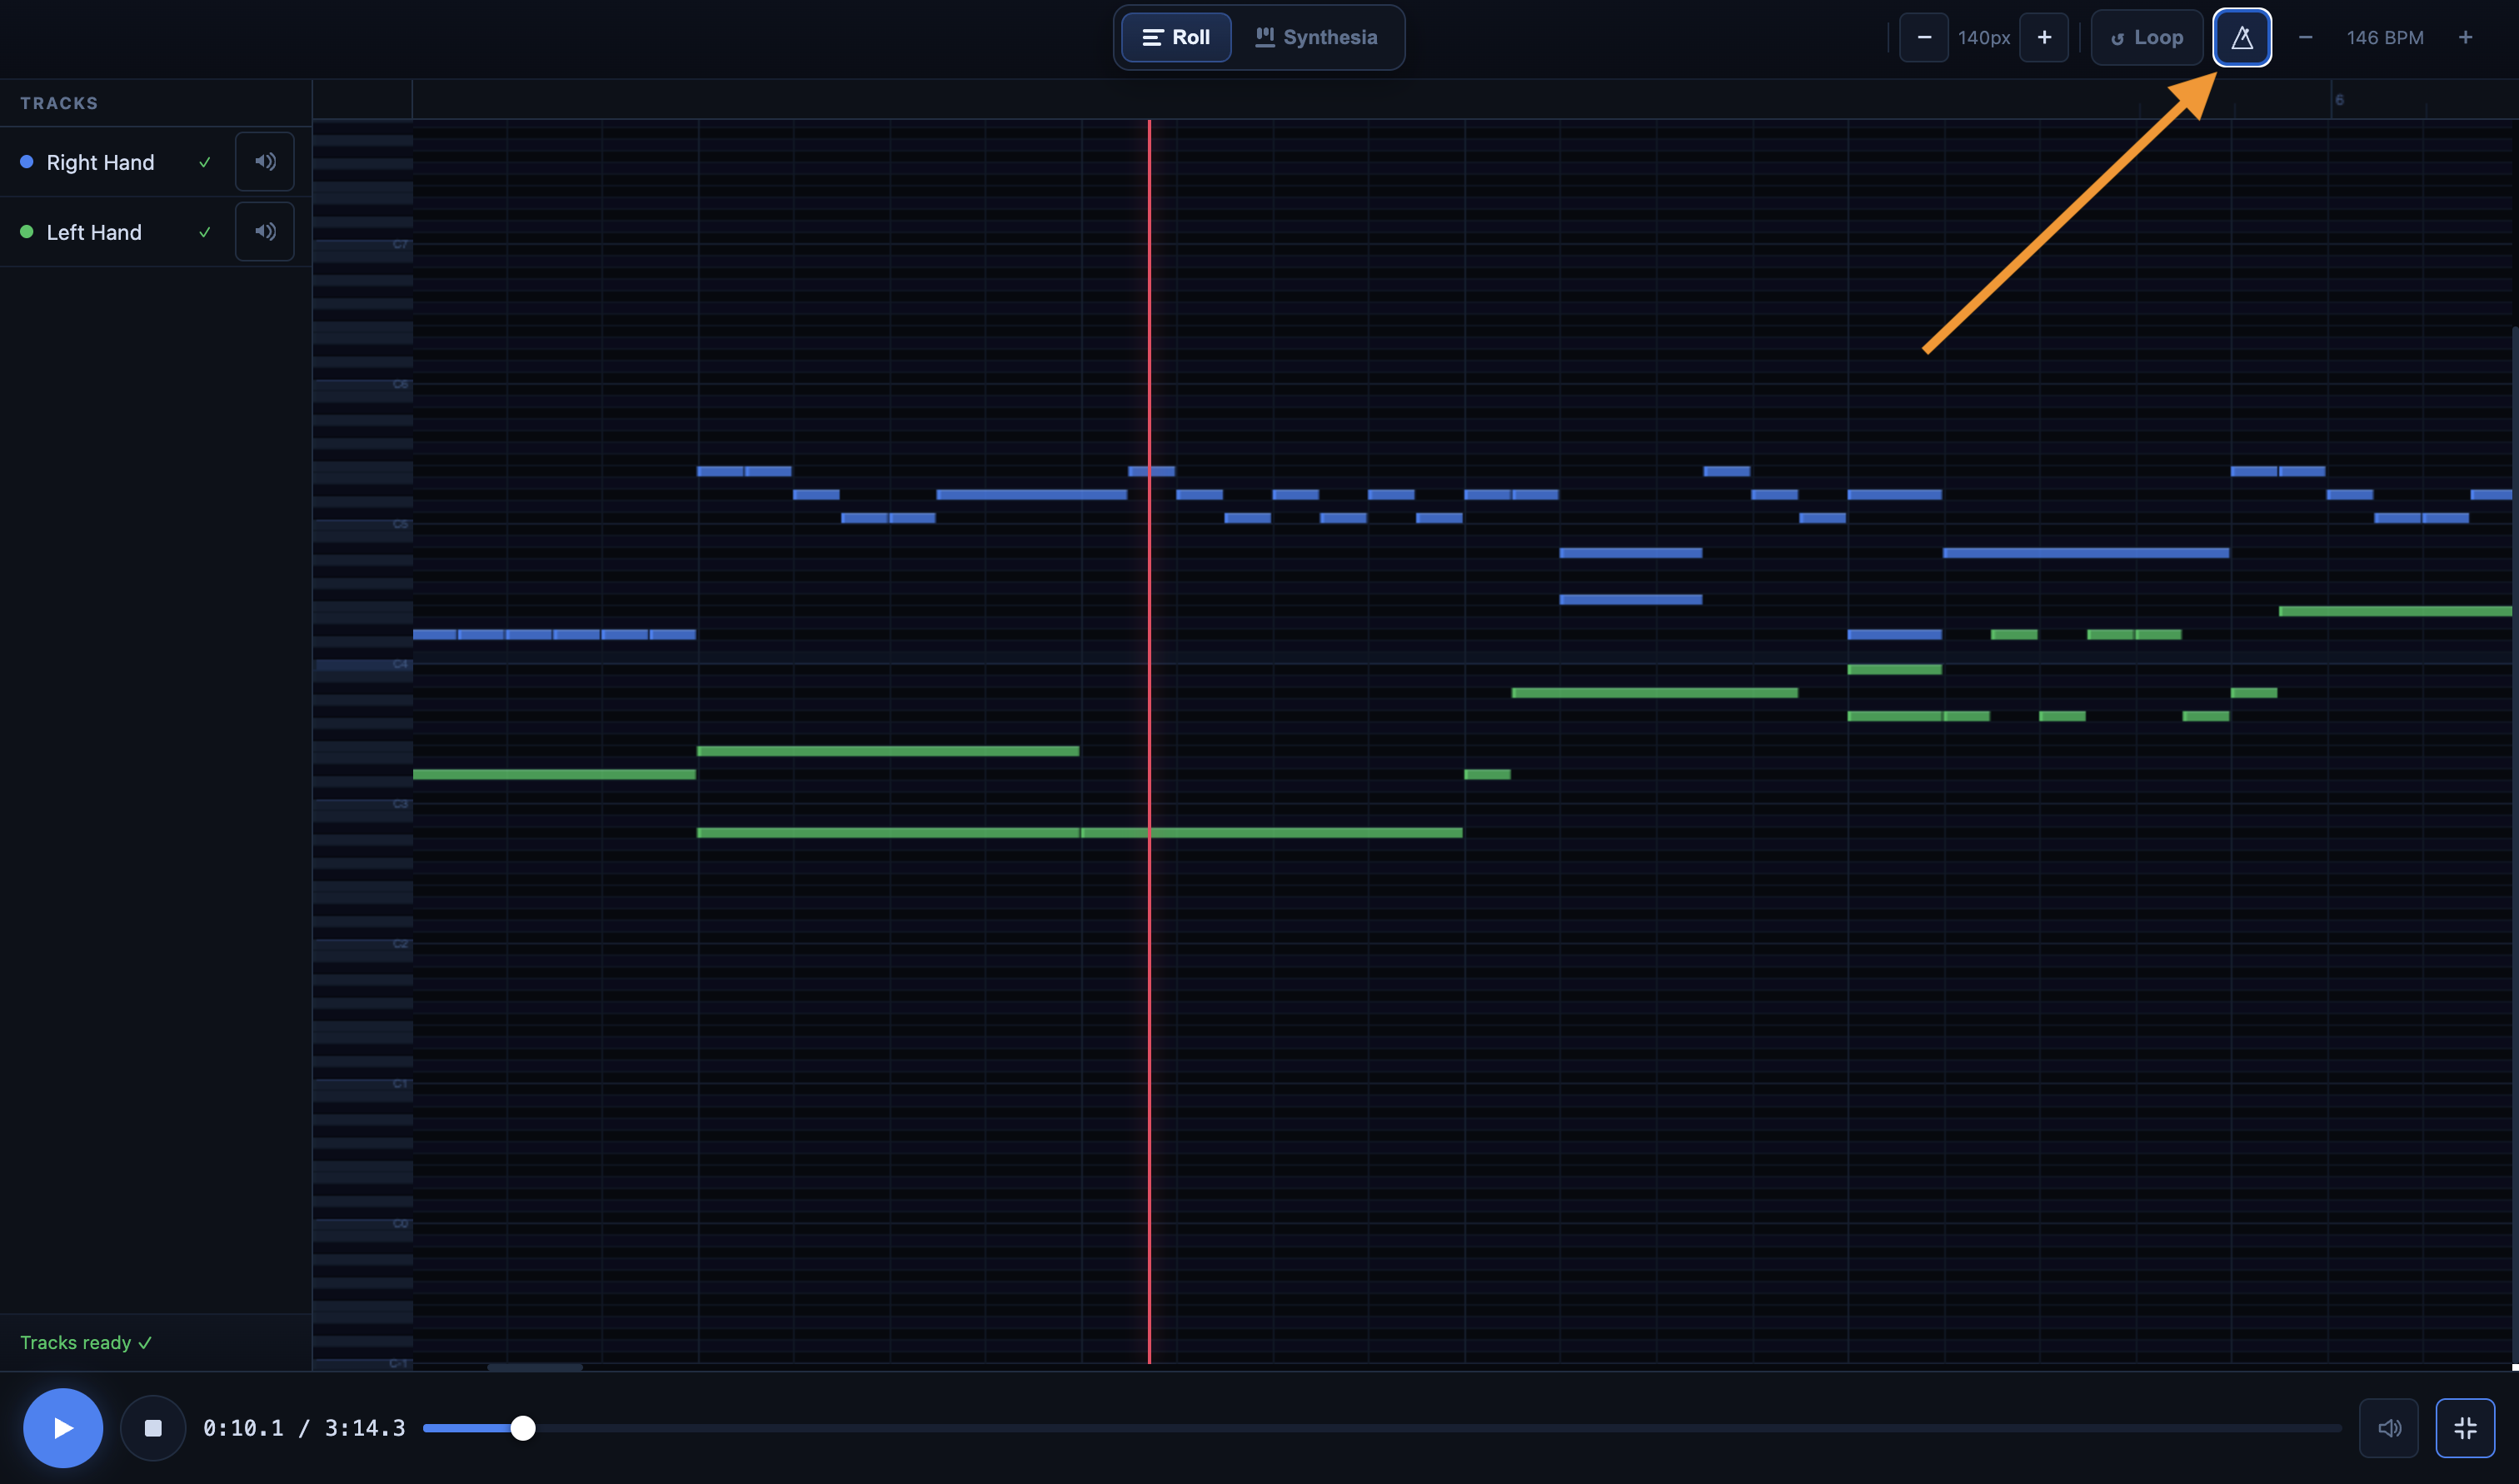
3.5 Metronome
The metronome helps you get a better feel for the piece's tempo.
It's useful for checking that a note lands in the right spot, especially after making a rhythmic correction. If you're unsure about the placement of a note, turning on the metronome is often a good habit to get into.
The keyboard shortcut is:
- M: turn the metronome on/off
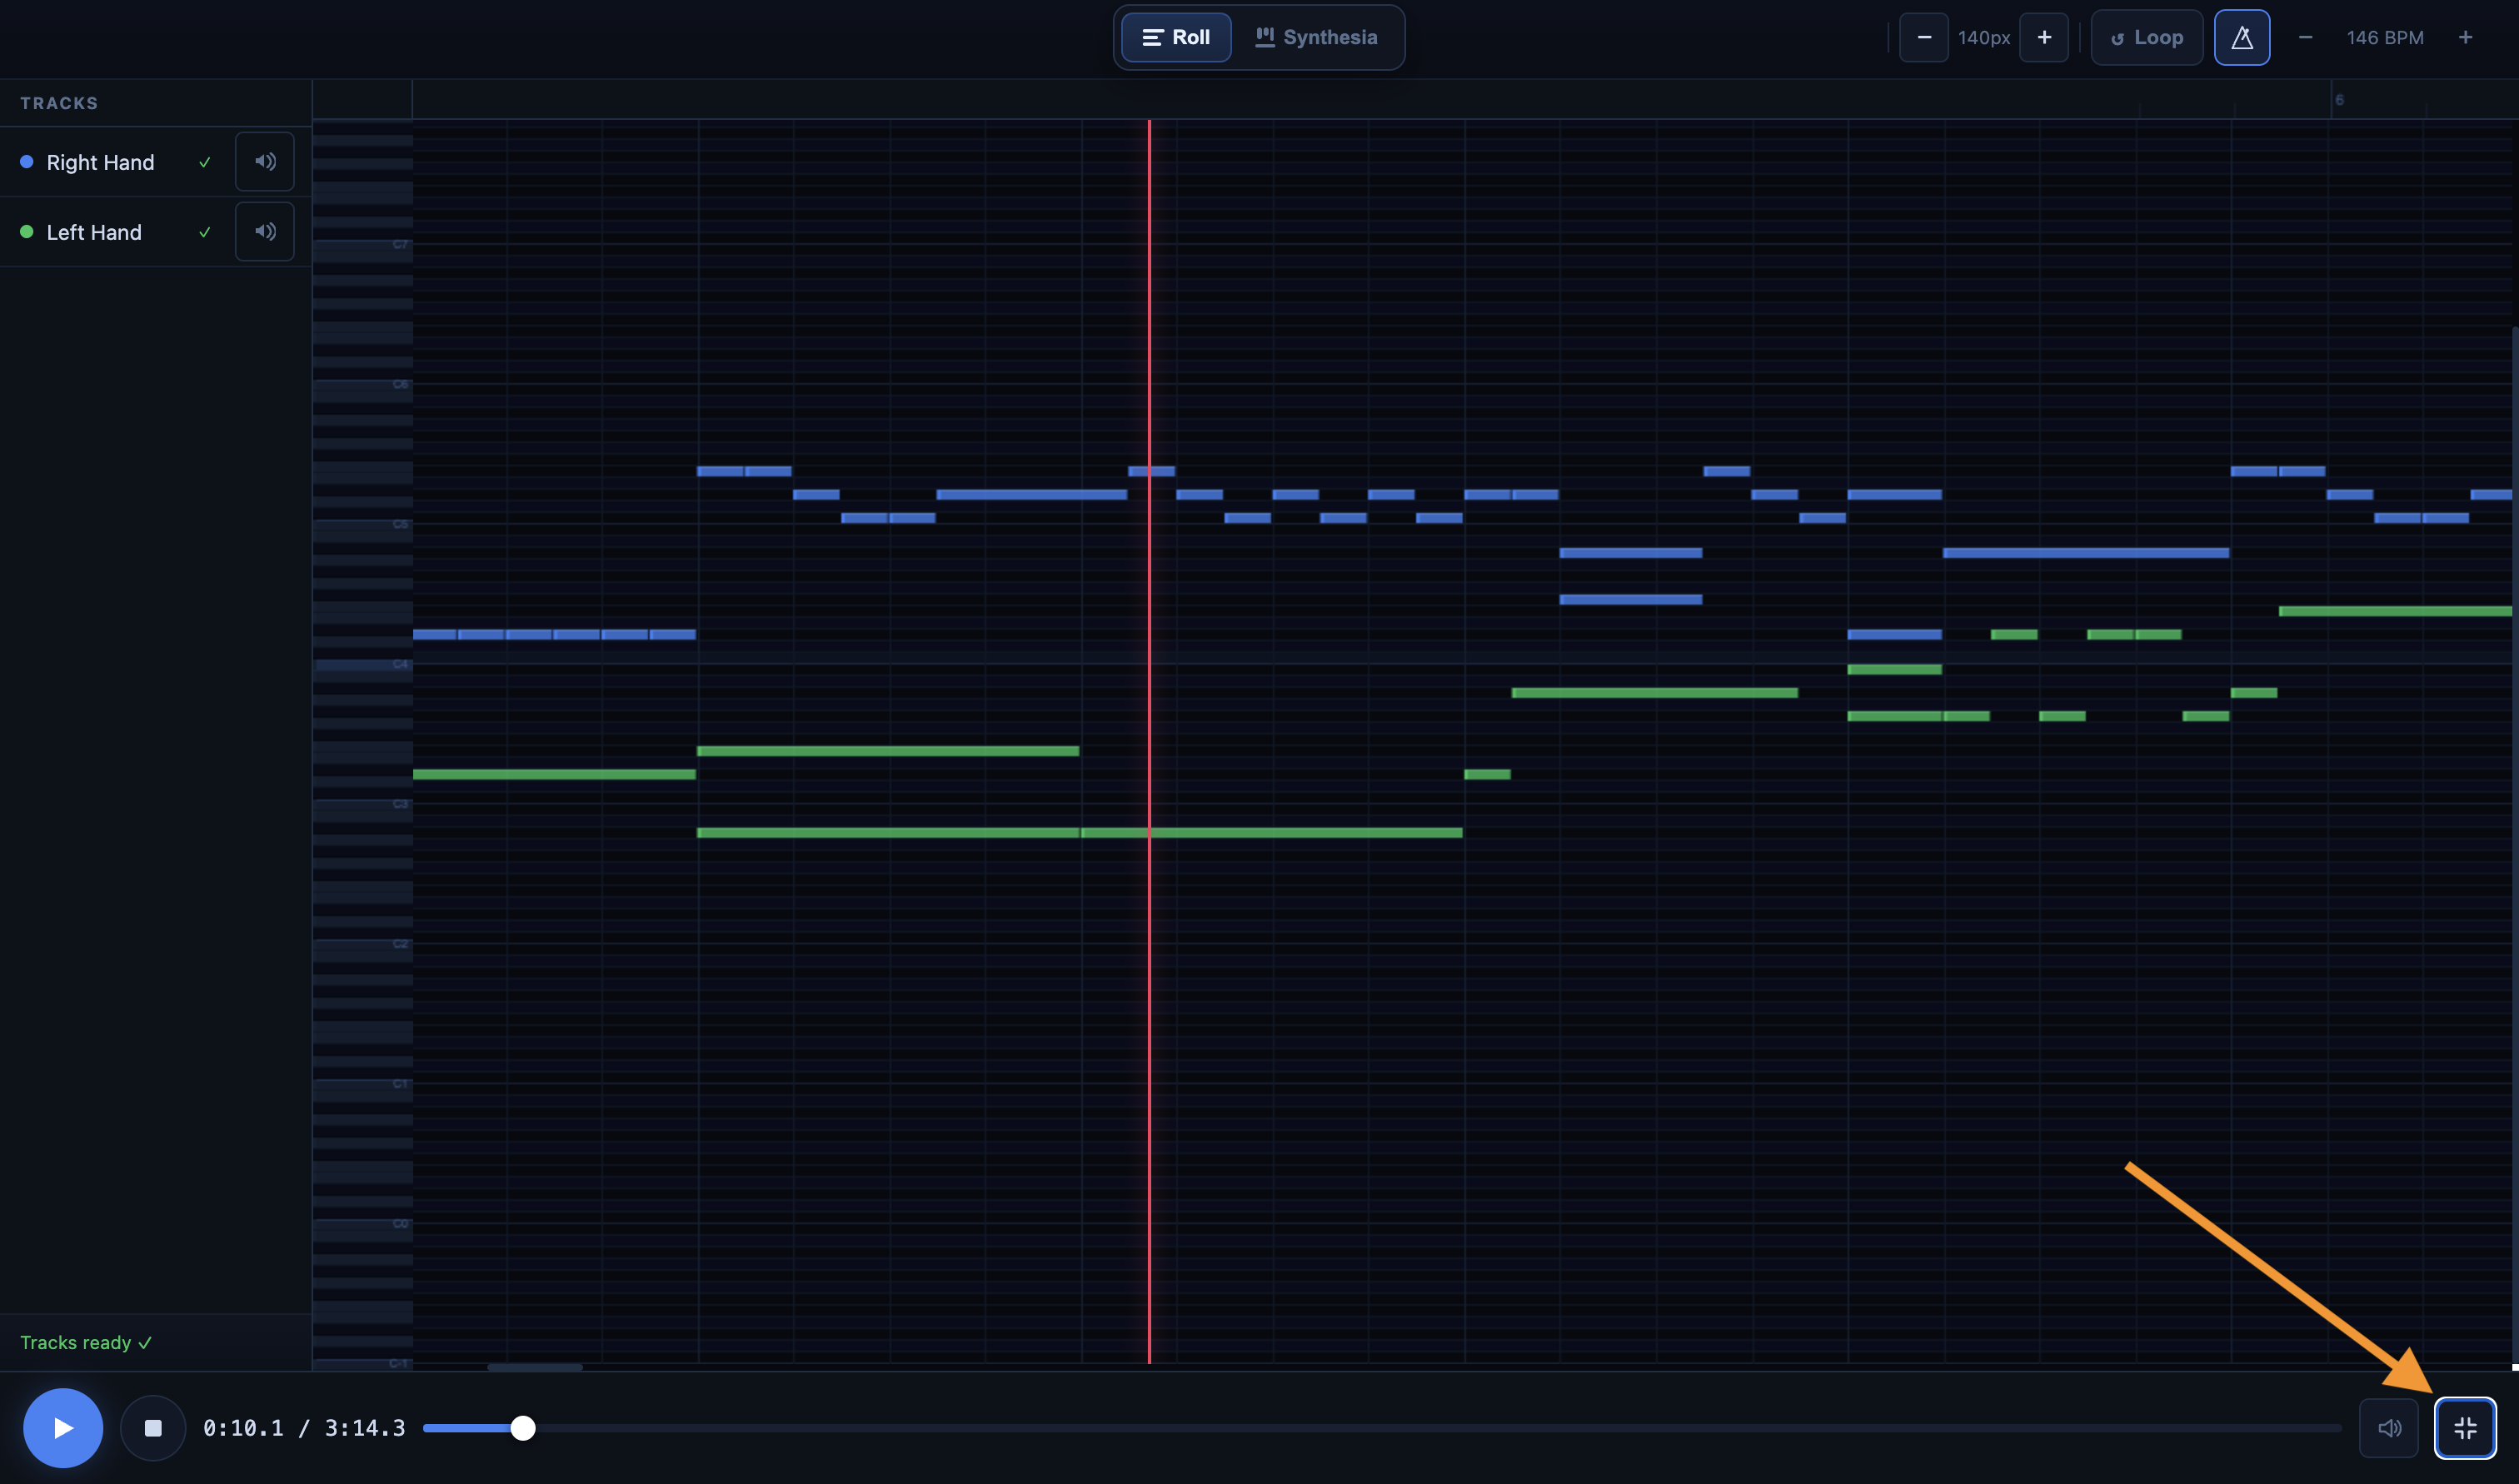
3.6 Full Screen
Full screen mode provides more space to work.
This is particularly useful when a passage contains a lot of notes, when you want to see the grid more clearly, or when you’re working on the Piano Roll for an extended period.
The associated keyboard shortcut is:
- F: Full screen / Exit full screen
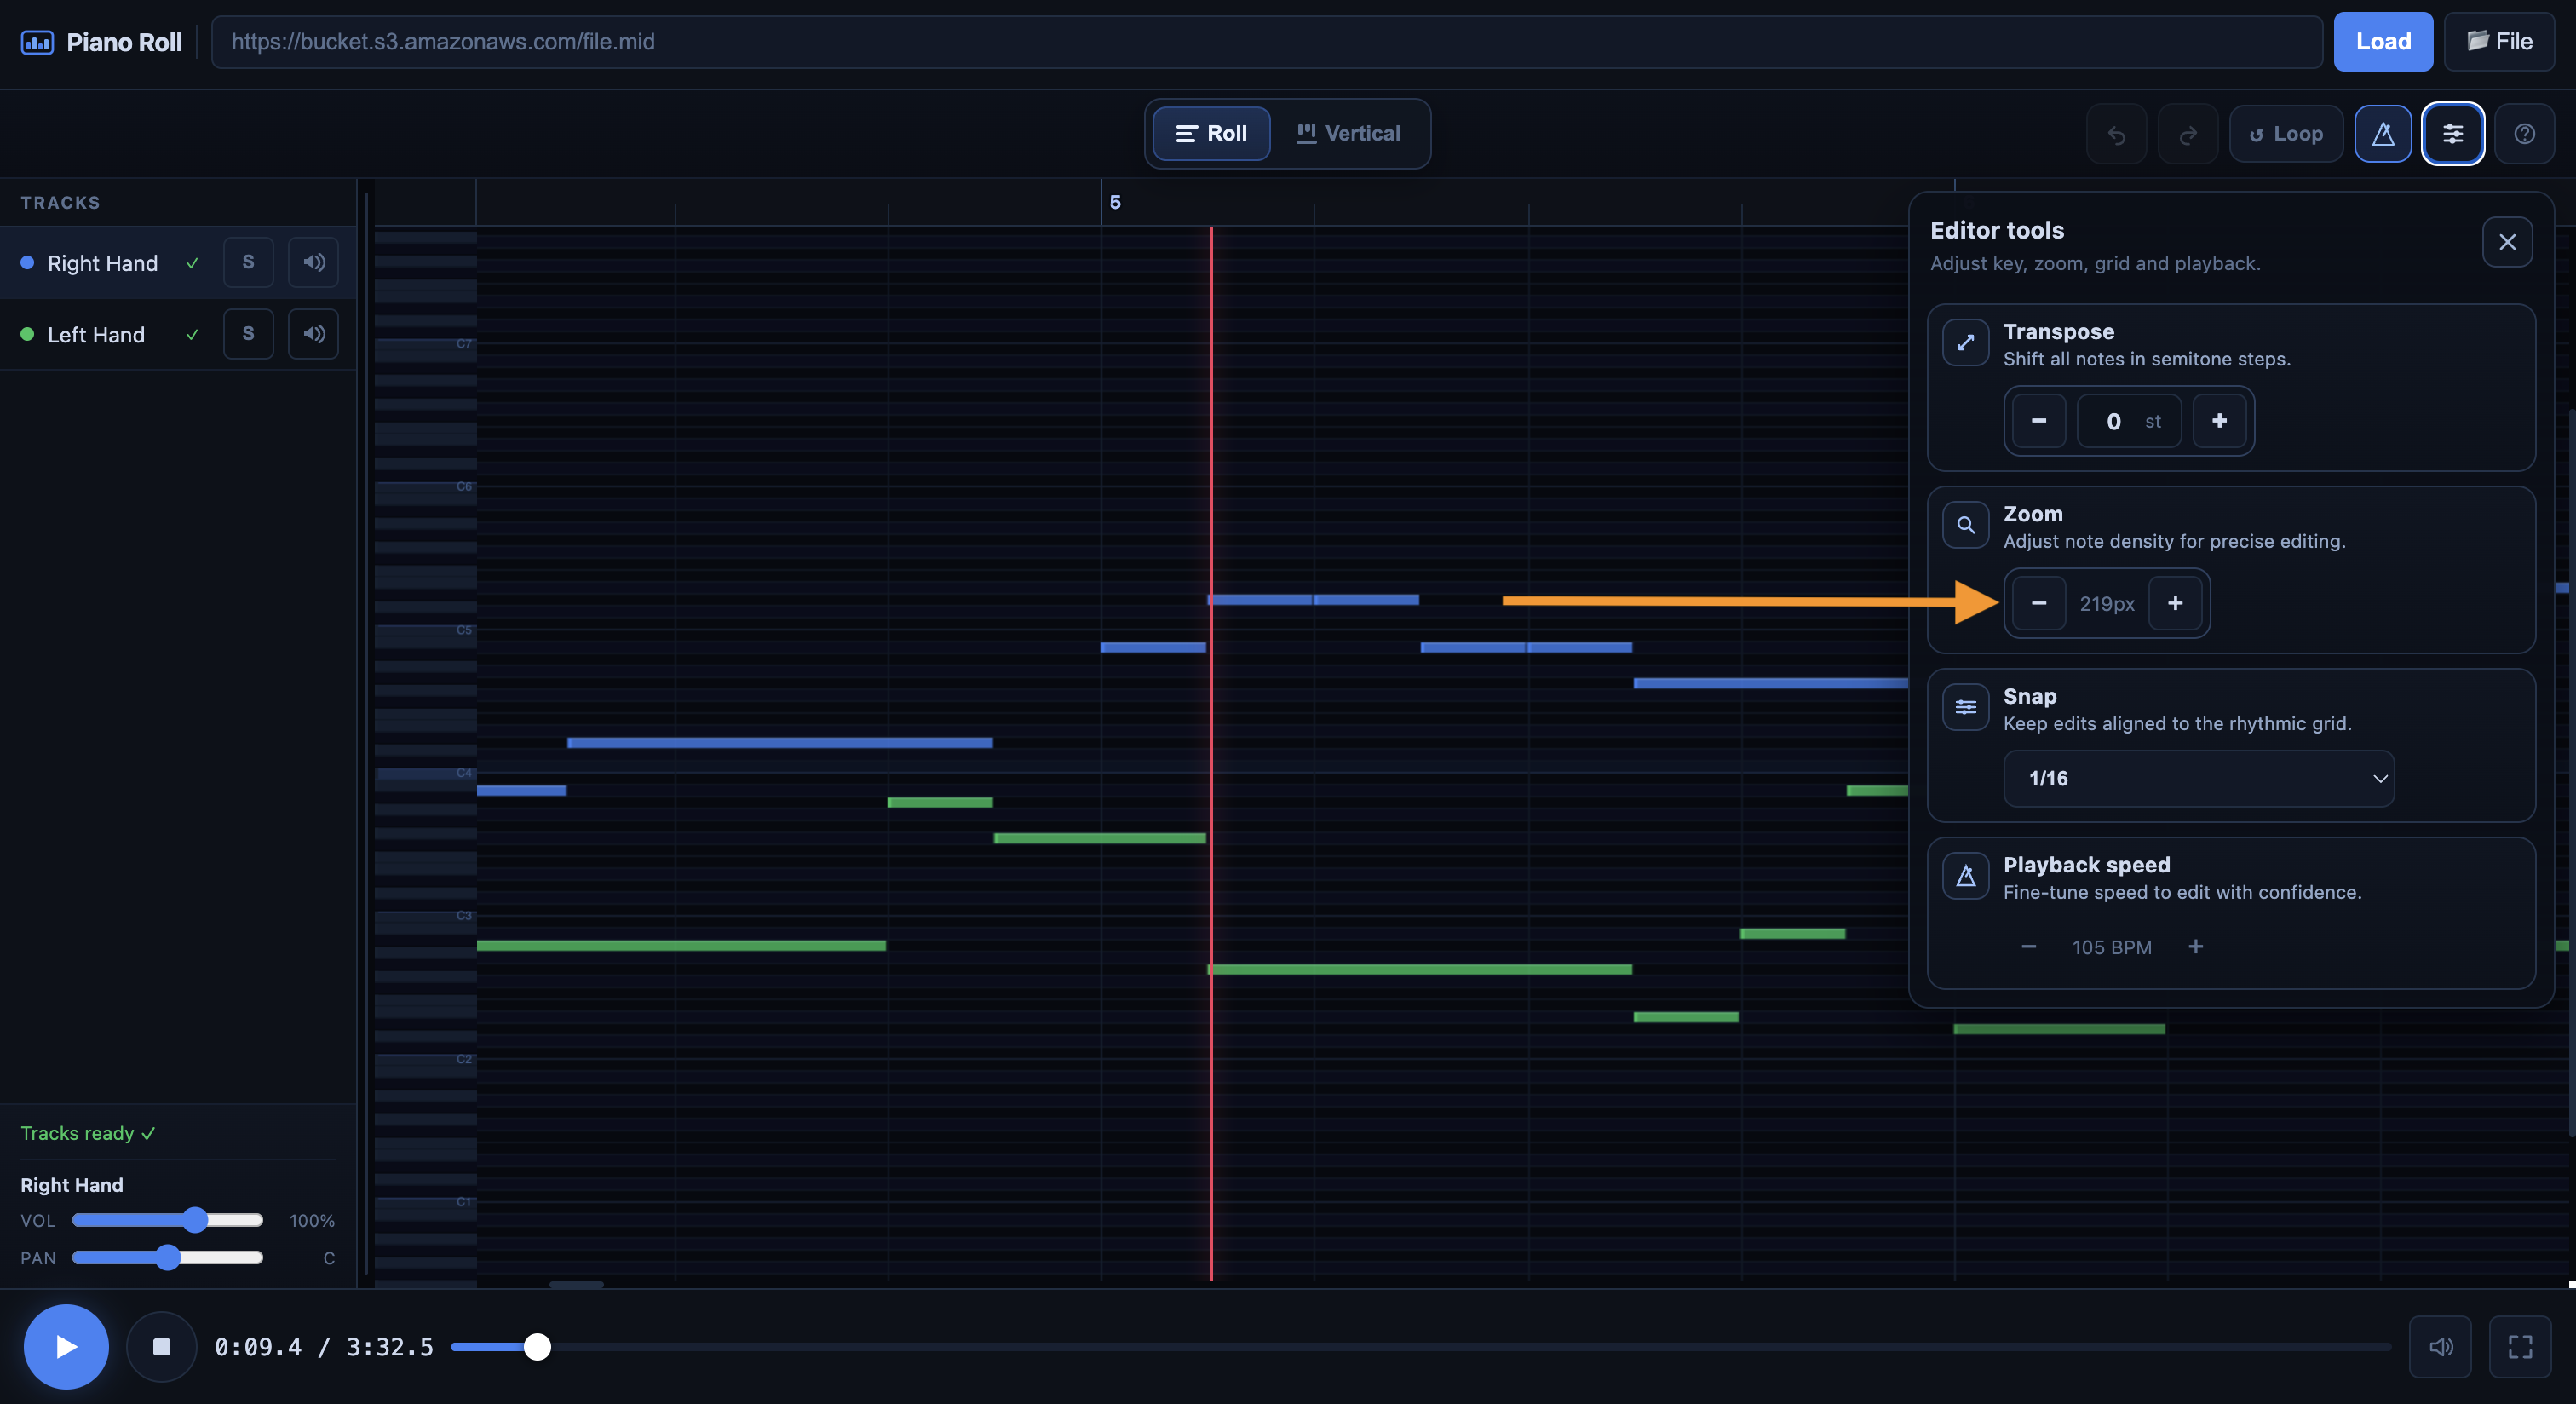
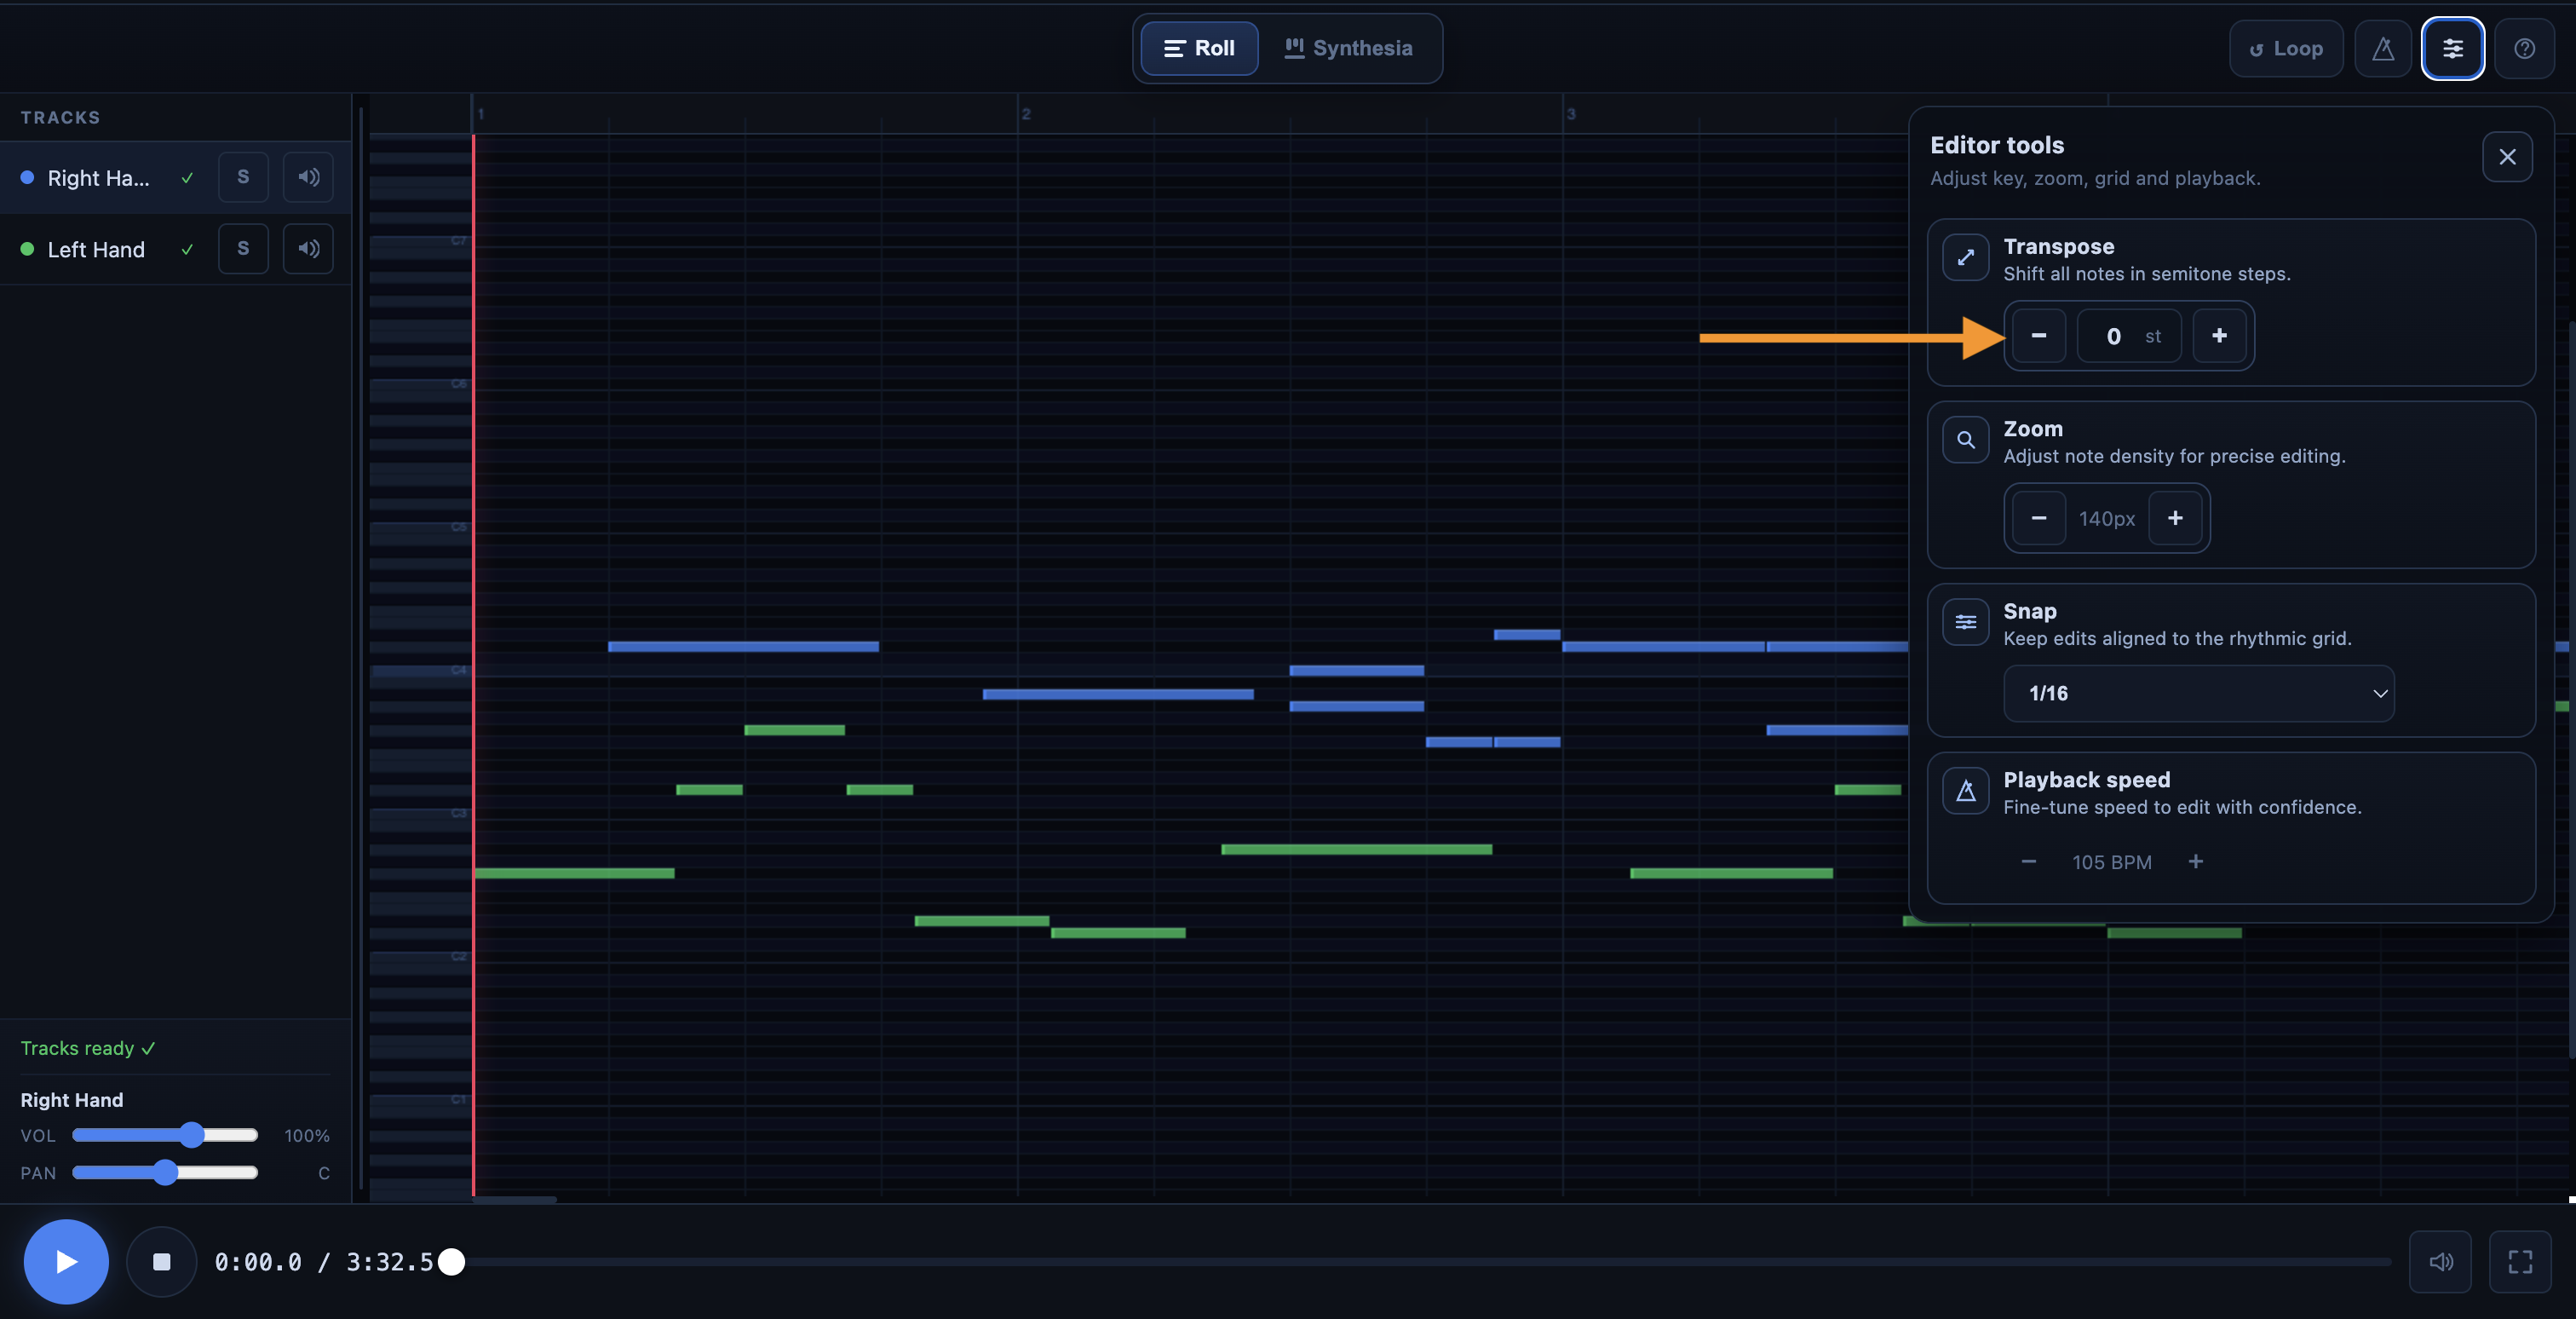
3.7 Zoom
The zoom feature enlarges the display so you can see the notes more clearly.
It’s one of the most important tools when a passage becomes dense or fast. The more you zoom in, the easier it becomes to select the right note, see its exact duration, and correct its placement precisely.
You can zoom:
- using the Zoom - / + buttons
- using Ctrl + scroll wheel / trackpad on a computer
- using a pinch gesture on a mobile device or tablet
The right reflex is simple: before correcting a busy passage, zoom in.
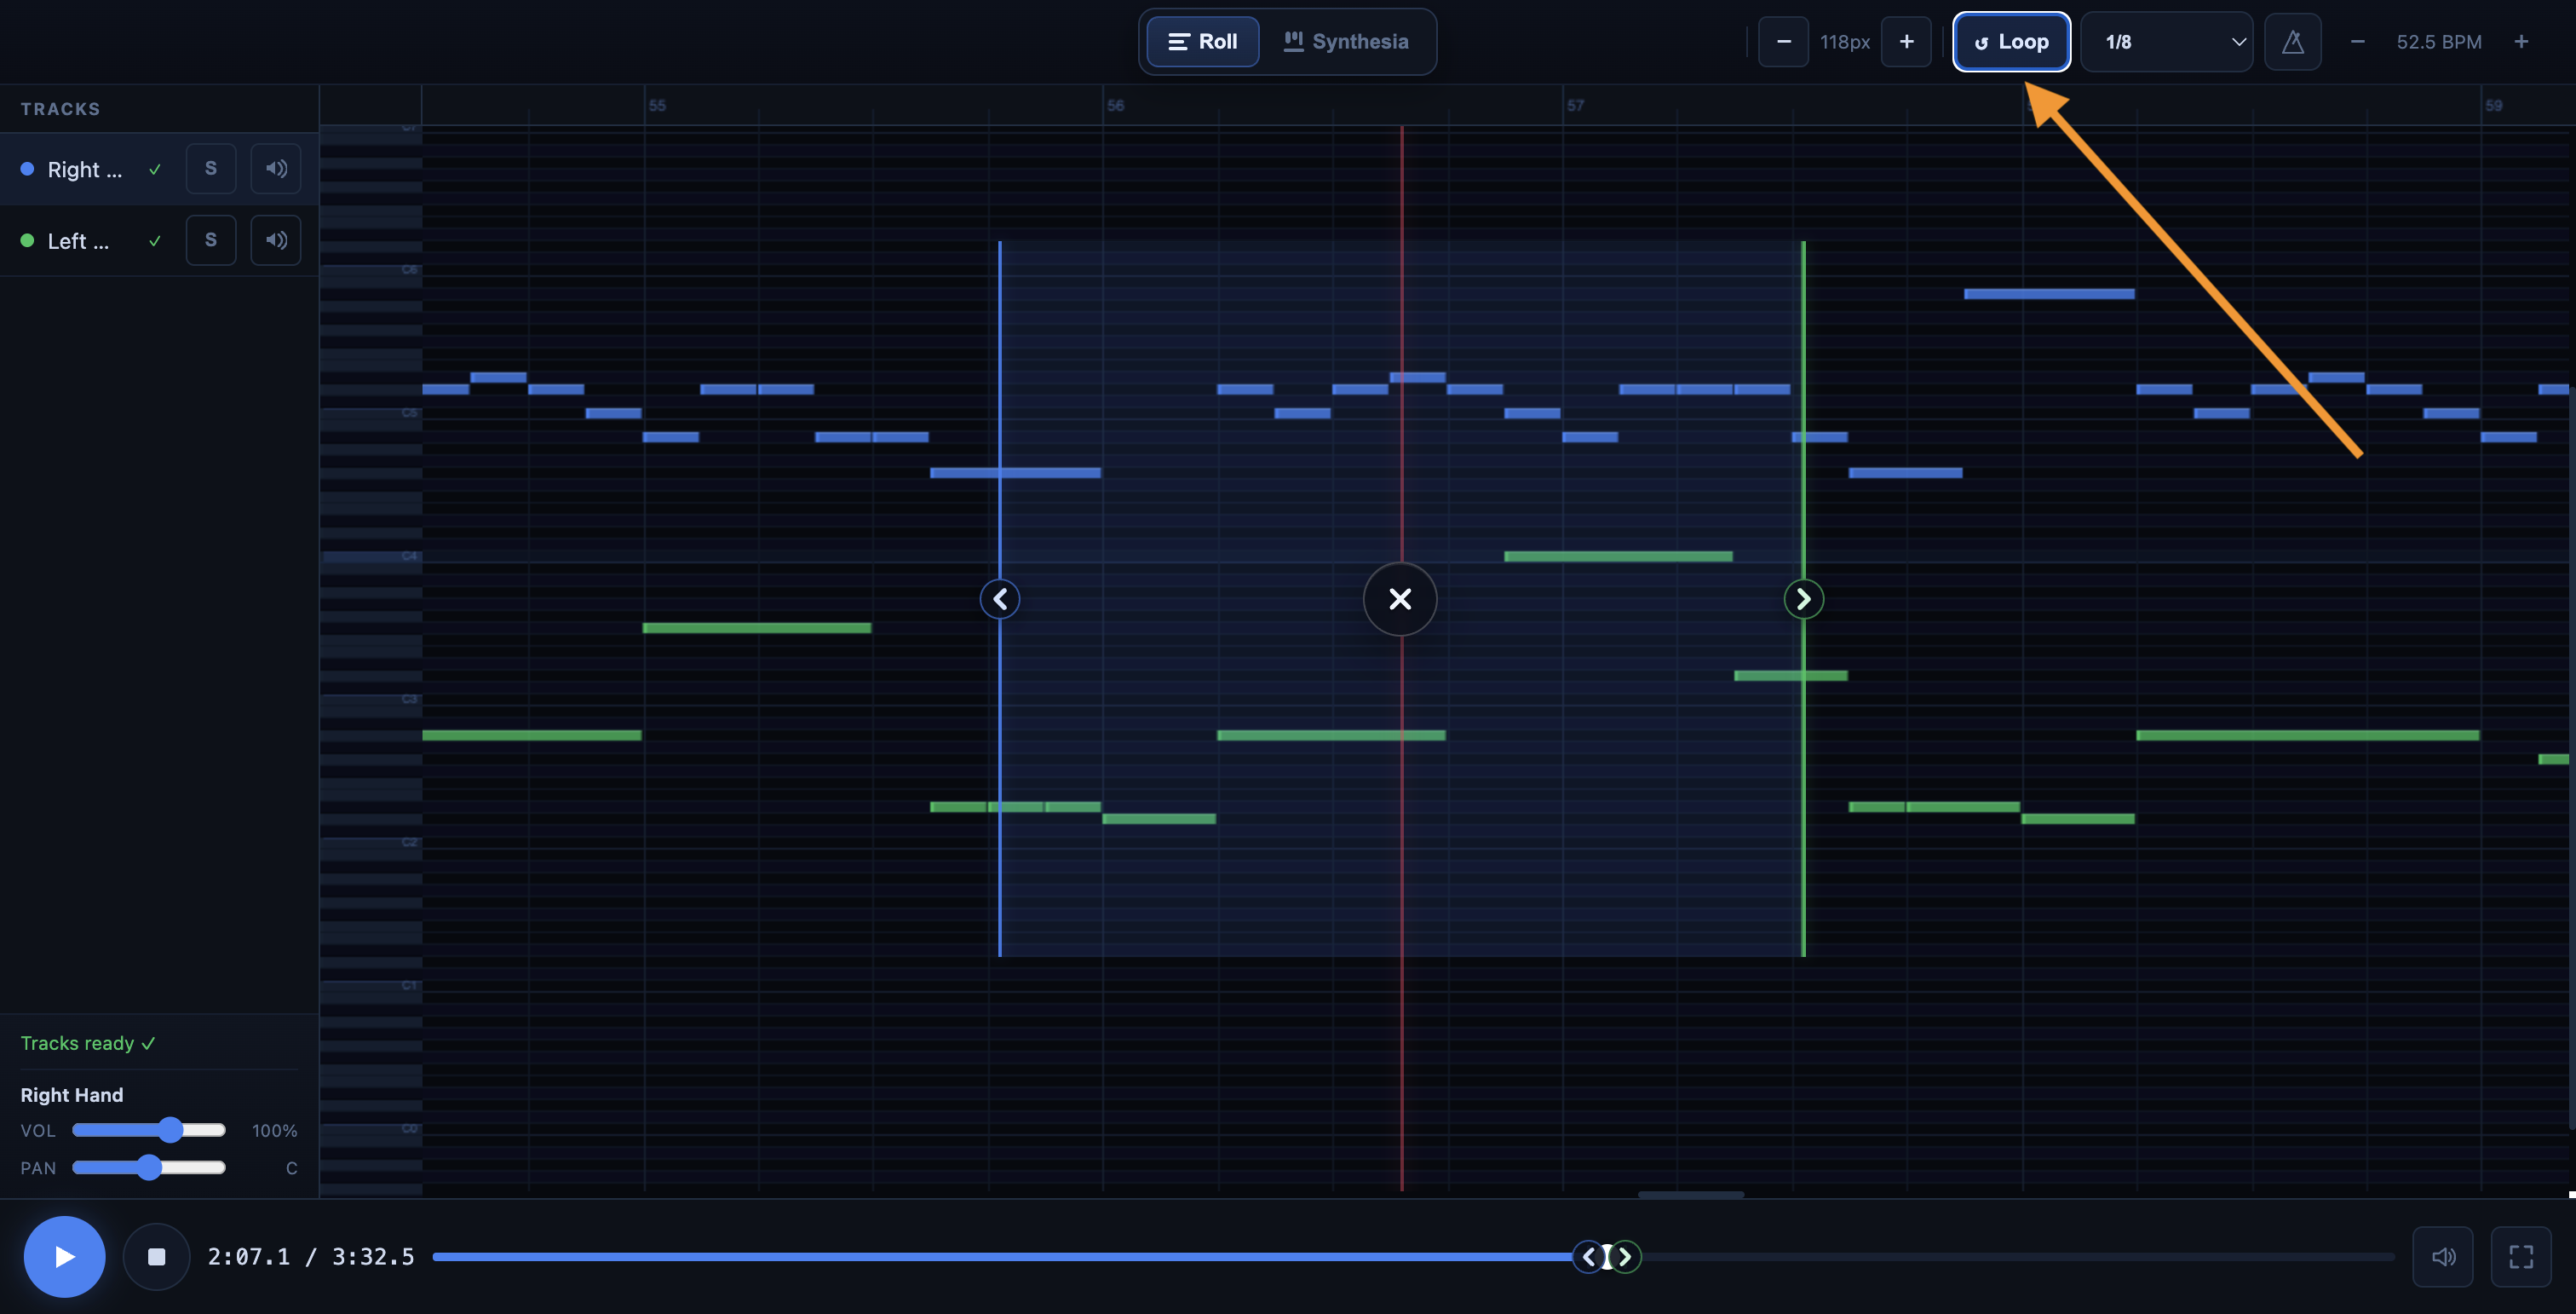
3.8 A/B Loop
The A/B loop allows you to loop a specific section of the track.
This is probably the most useful tool for making effective corrections. Instead of restarting the entire playback, you can isolate a measure or a musical phrase, listen to it several times, make corrections, and then listen to it again immediately.
The main keyboard shortcut is:
- L: enable/disable the loop
You can also quickly adjust the loop with:
- [: start of loop
- ]: end of loop
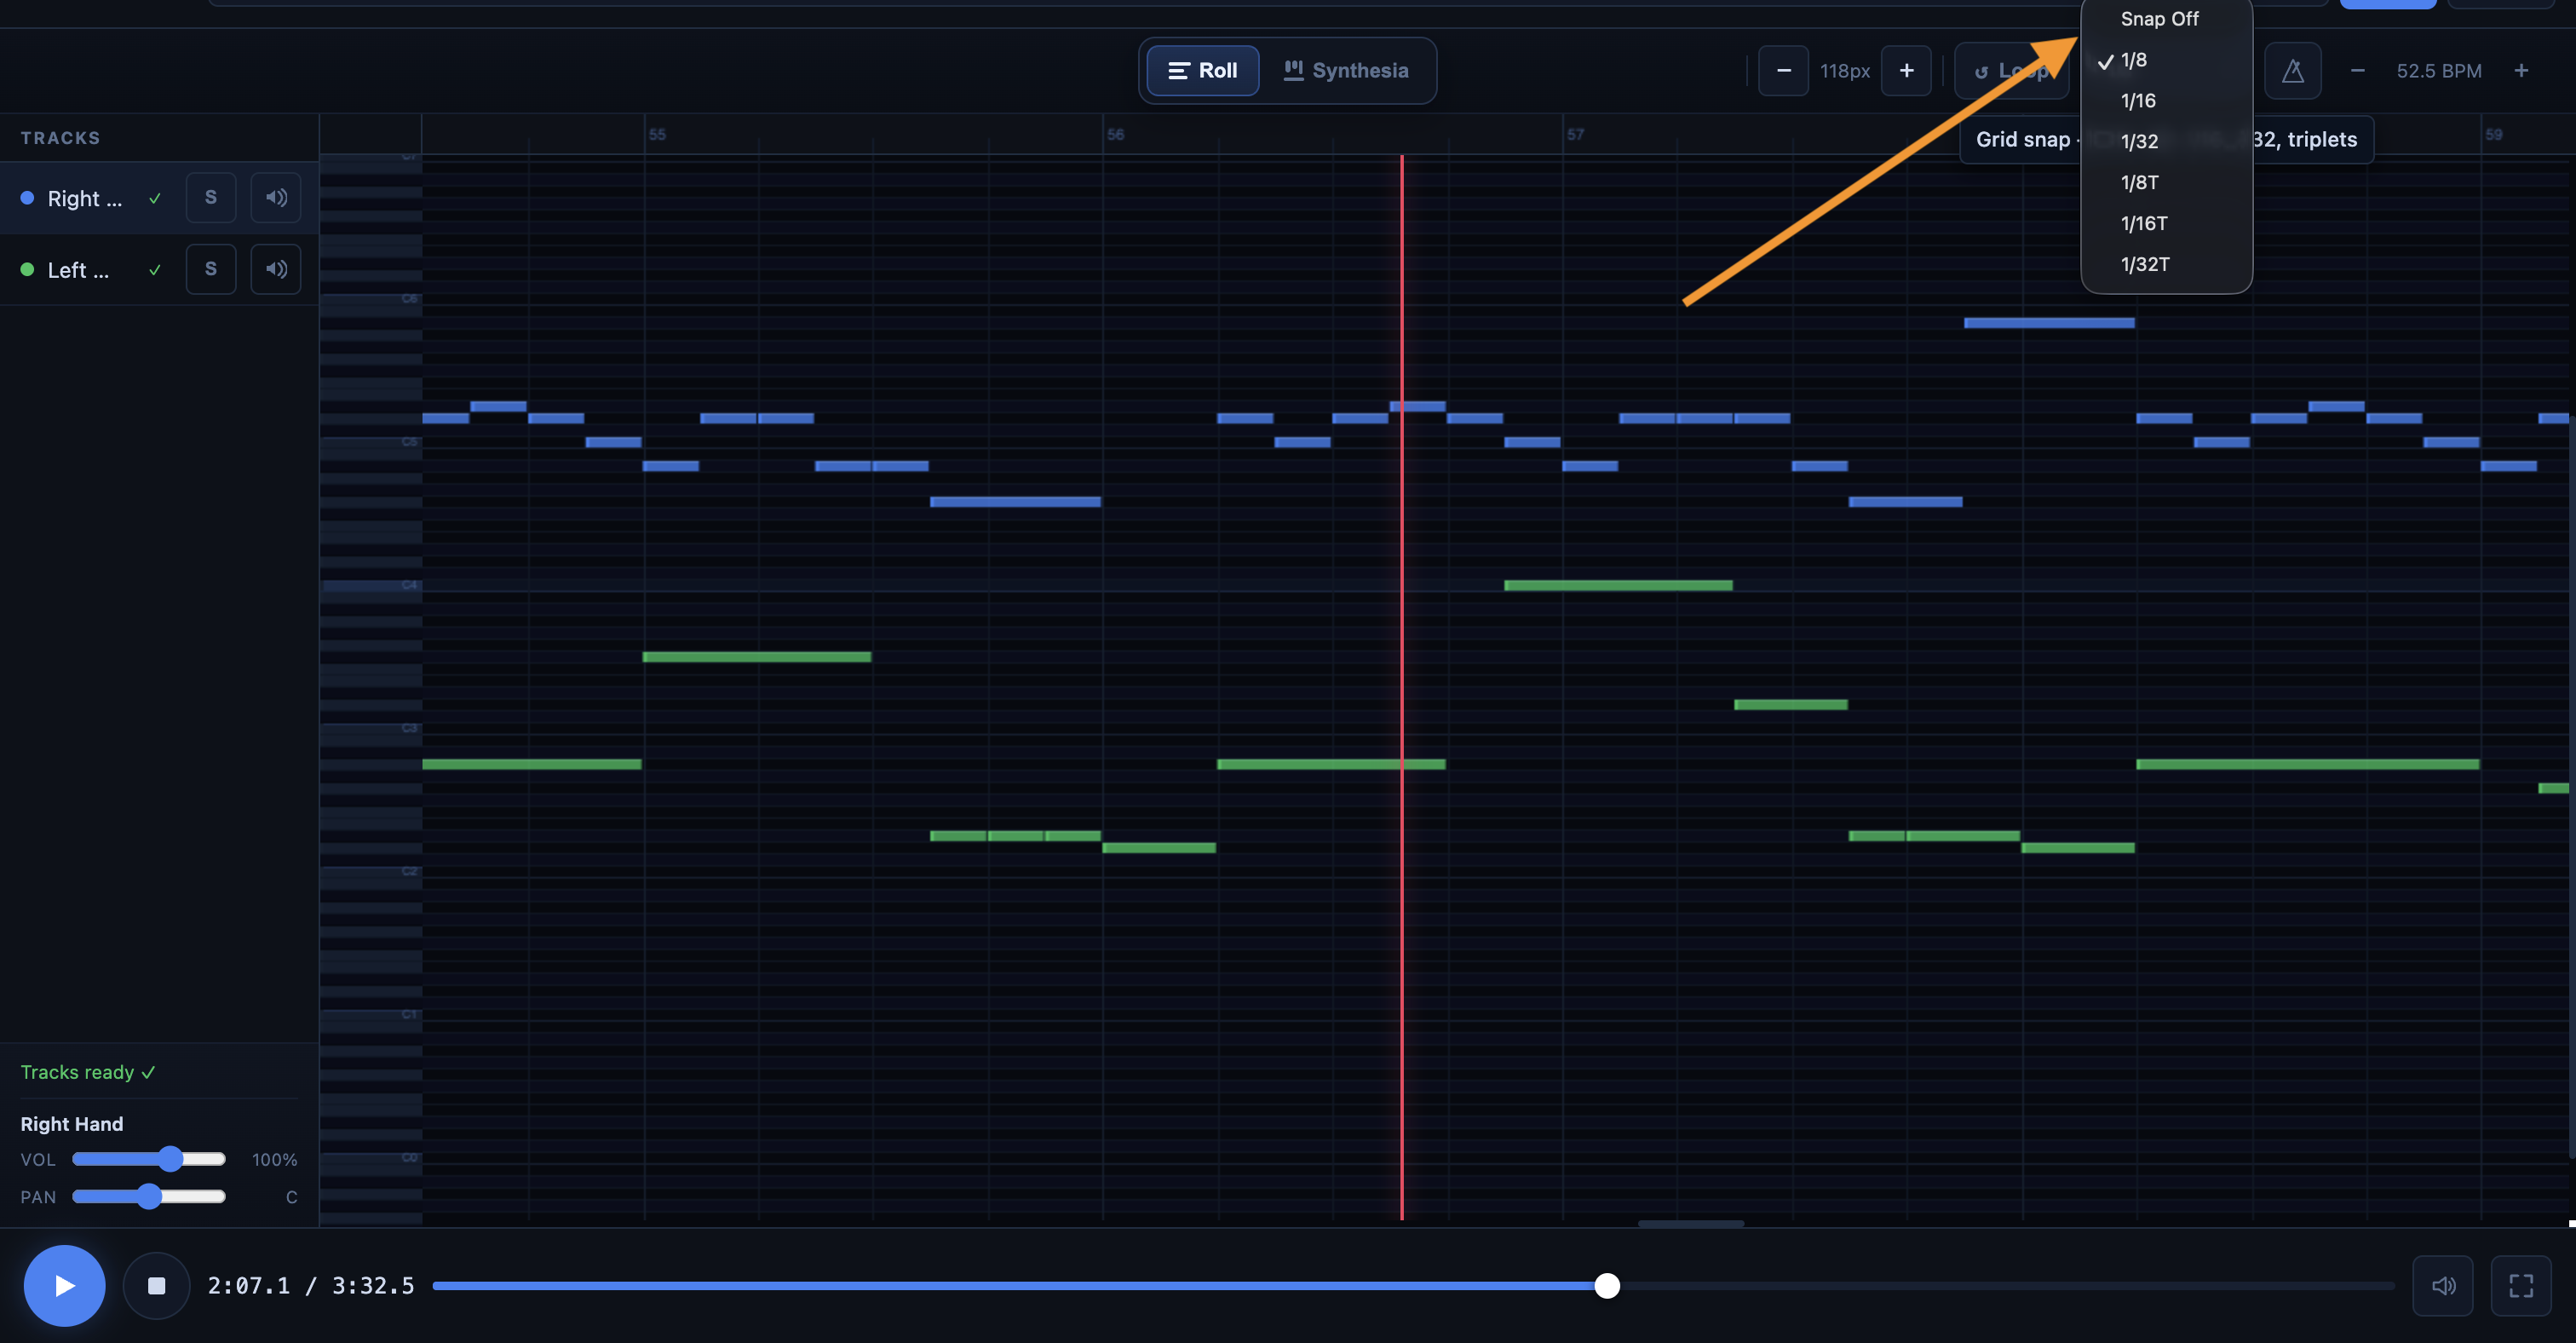
3.9 Snap
The Snap feature is used to align notes to a rhythmic grid.
When enabled, notes you create, move, or resize automatically snap to the selected grid. This prevents small, unintended misalignments, which are often barely noticeable but can be distracting when listening.
In most cases, this is a very useful tool for keeping your MIDI clean. If you want more freedom in placement, you can disable Snap, or temporarily bypass it while moving notes.
The available settings are:
- Off
- 1/8
- 1/16
- 1/32
- 1/8T
- 1/16T
- 1/32T
For more freedom while moving notes:
- Shift: temporarily bypass Snap
3.10 Track Area
The track area lets you manage different parts of the MIDI separately.
This is very useful when multiple elements overlap and you want to better understand what you’re hearing. For example, if a passage sounds confusing, you can isolate a single track to hear more clearly what it’s playing.
In particular, you can:
- mute a track with Mute
- isolate a track with Solo
- adjust its volume
- adjust its pan
When a MIDI file is dense, working track by track often allows you to work much faster.

3.11 Transpose
In the editor, you can transpose all the notes in your MIDI file at once using the note transposition feature.
Click the + button to raise all notes by a semitone, or the - button to lower all notes by a semitone.
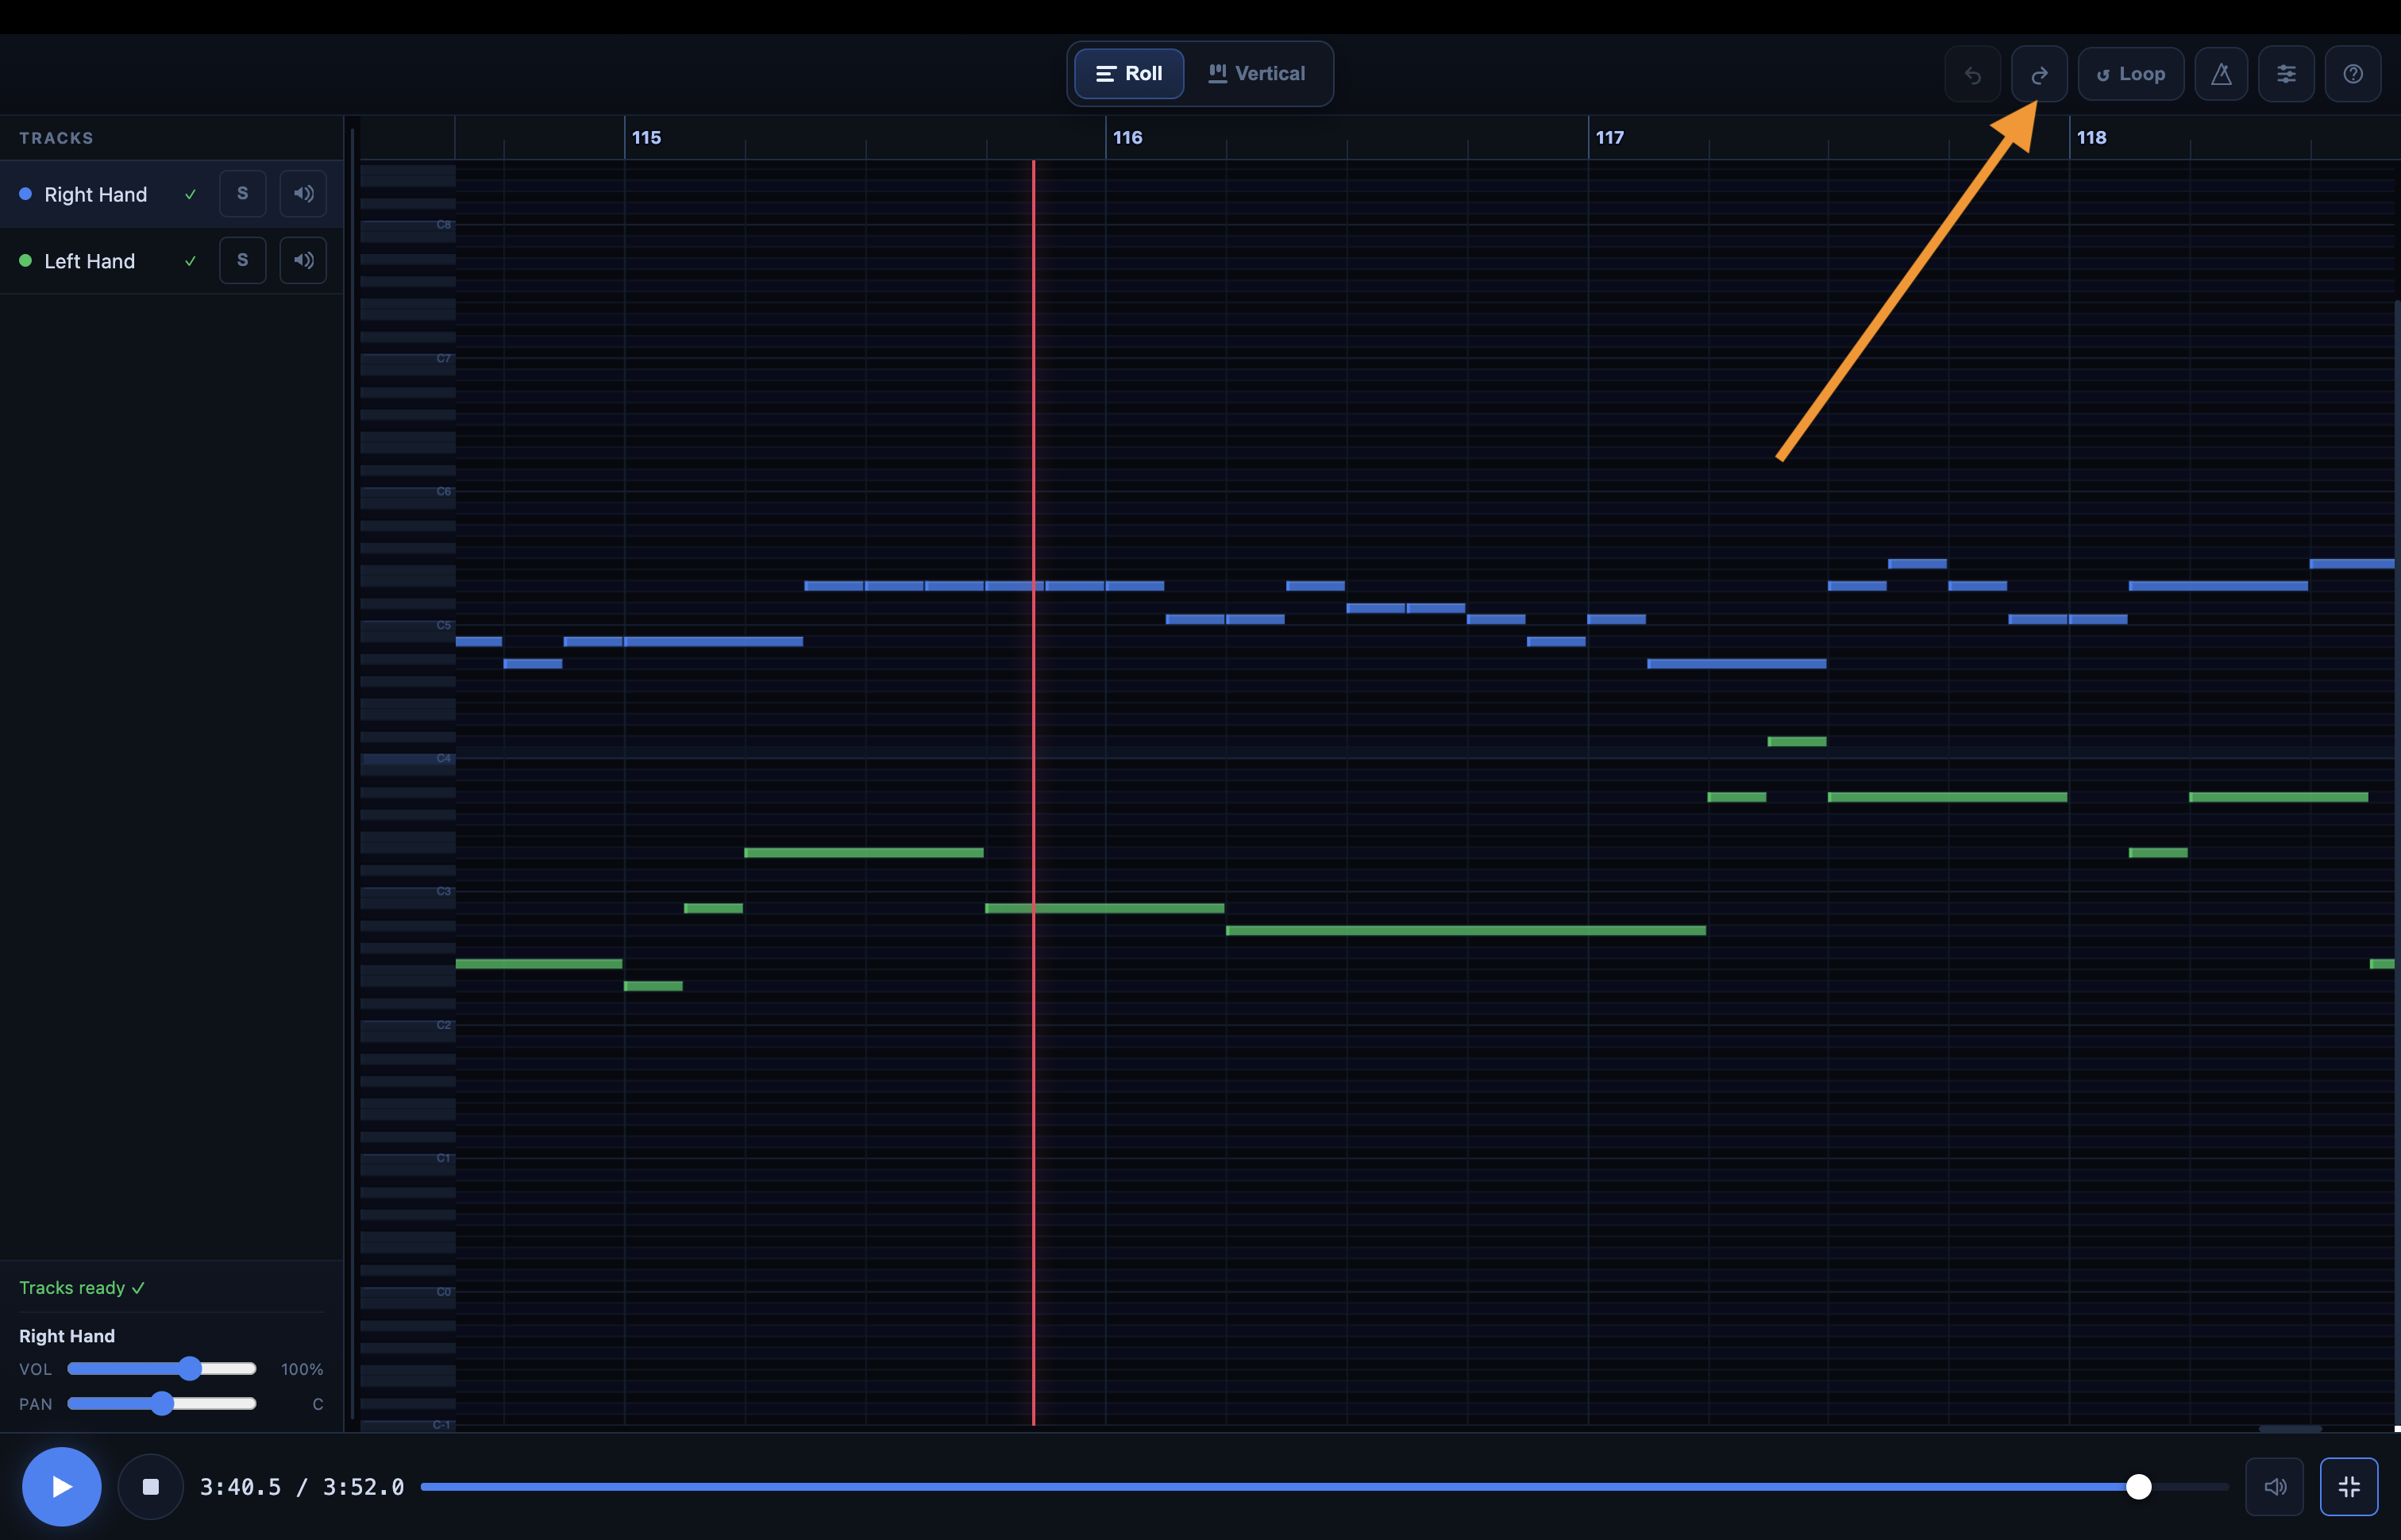
3.12 Undo and Redo
After making changes in the Piano Roll view (deleting a note, duplicating a note, extending a note, etc.), you can always undo any mistakes by clicking the "Undo" button at the top of the Piano Roll (or pressing Cmd/Ctrl + Z on your keyboard):
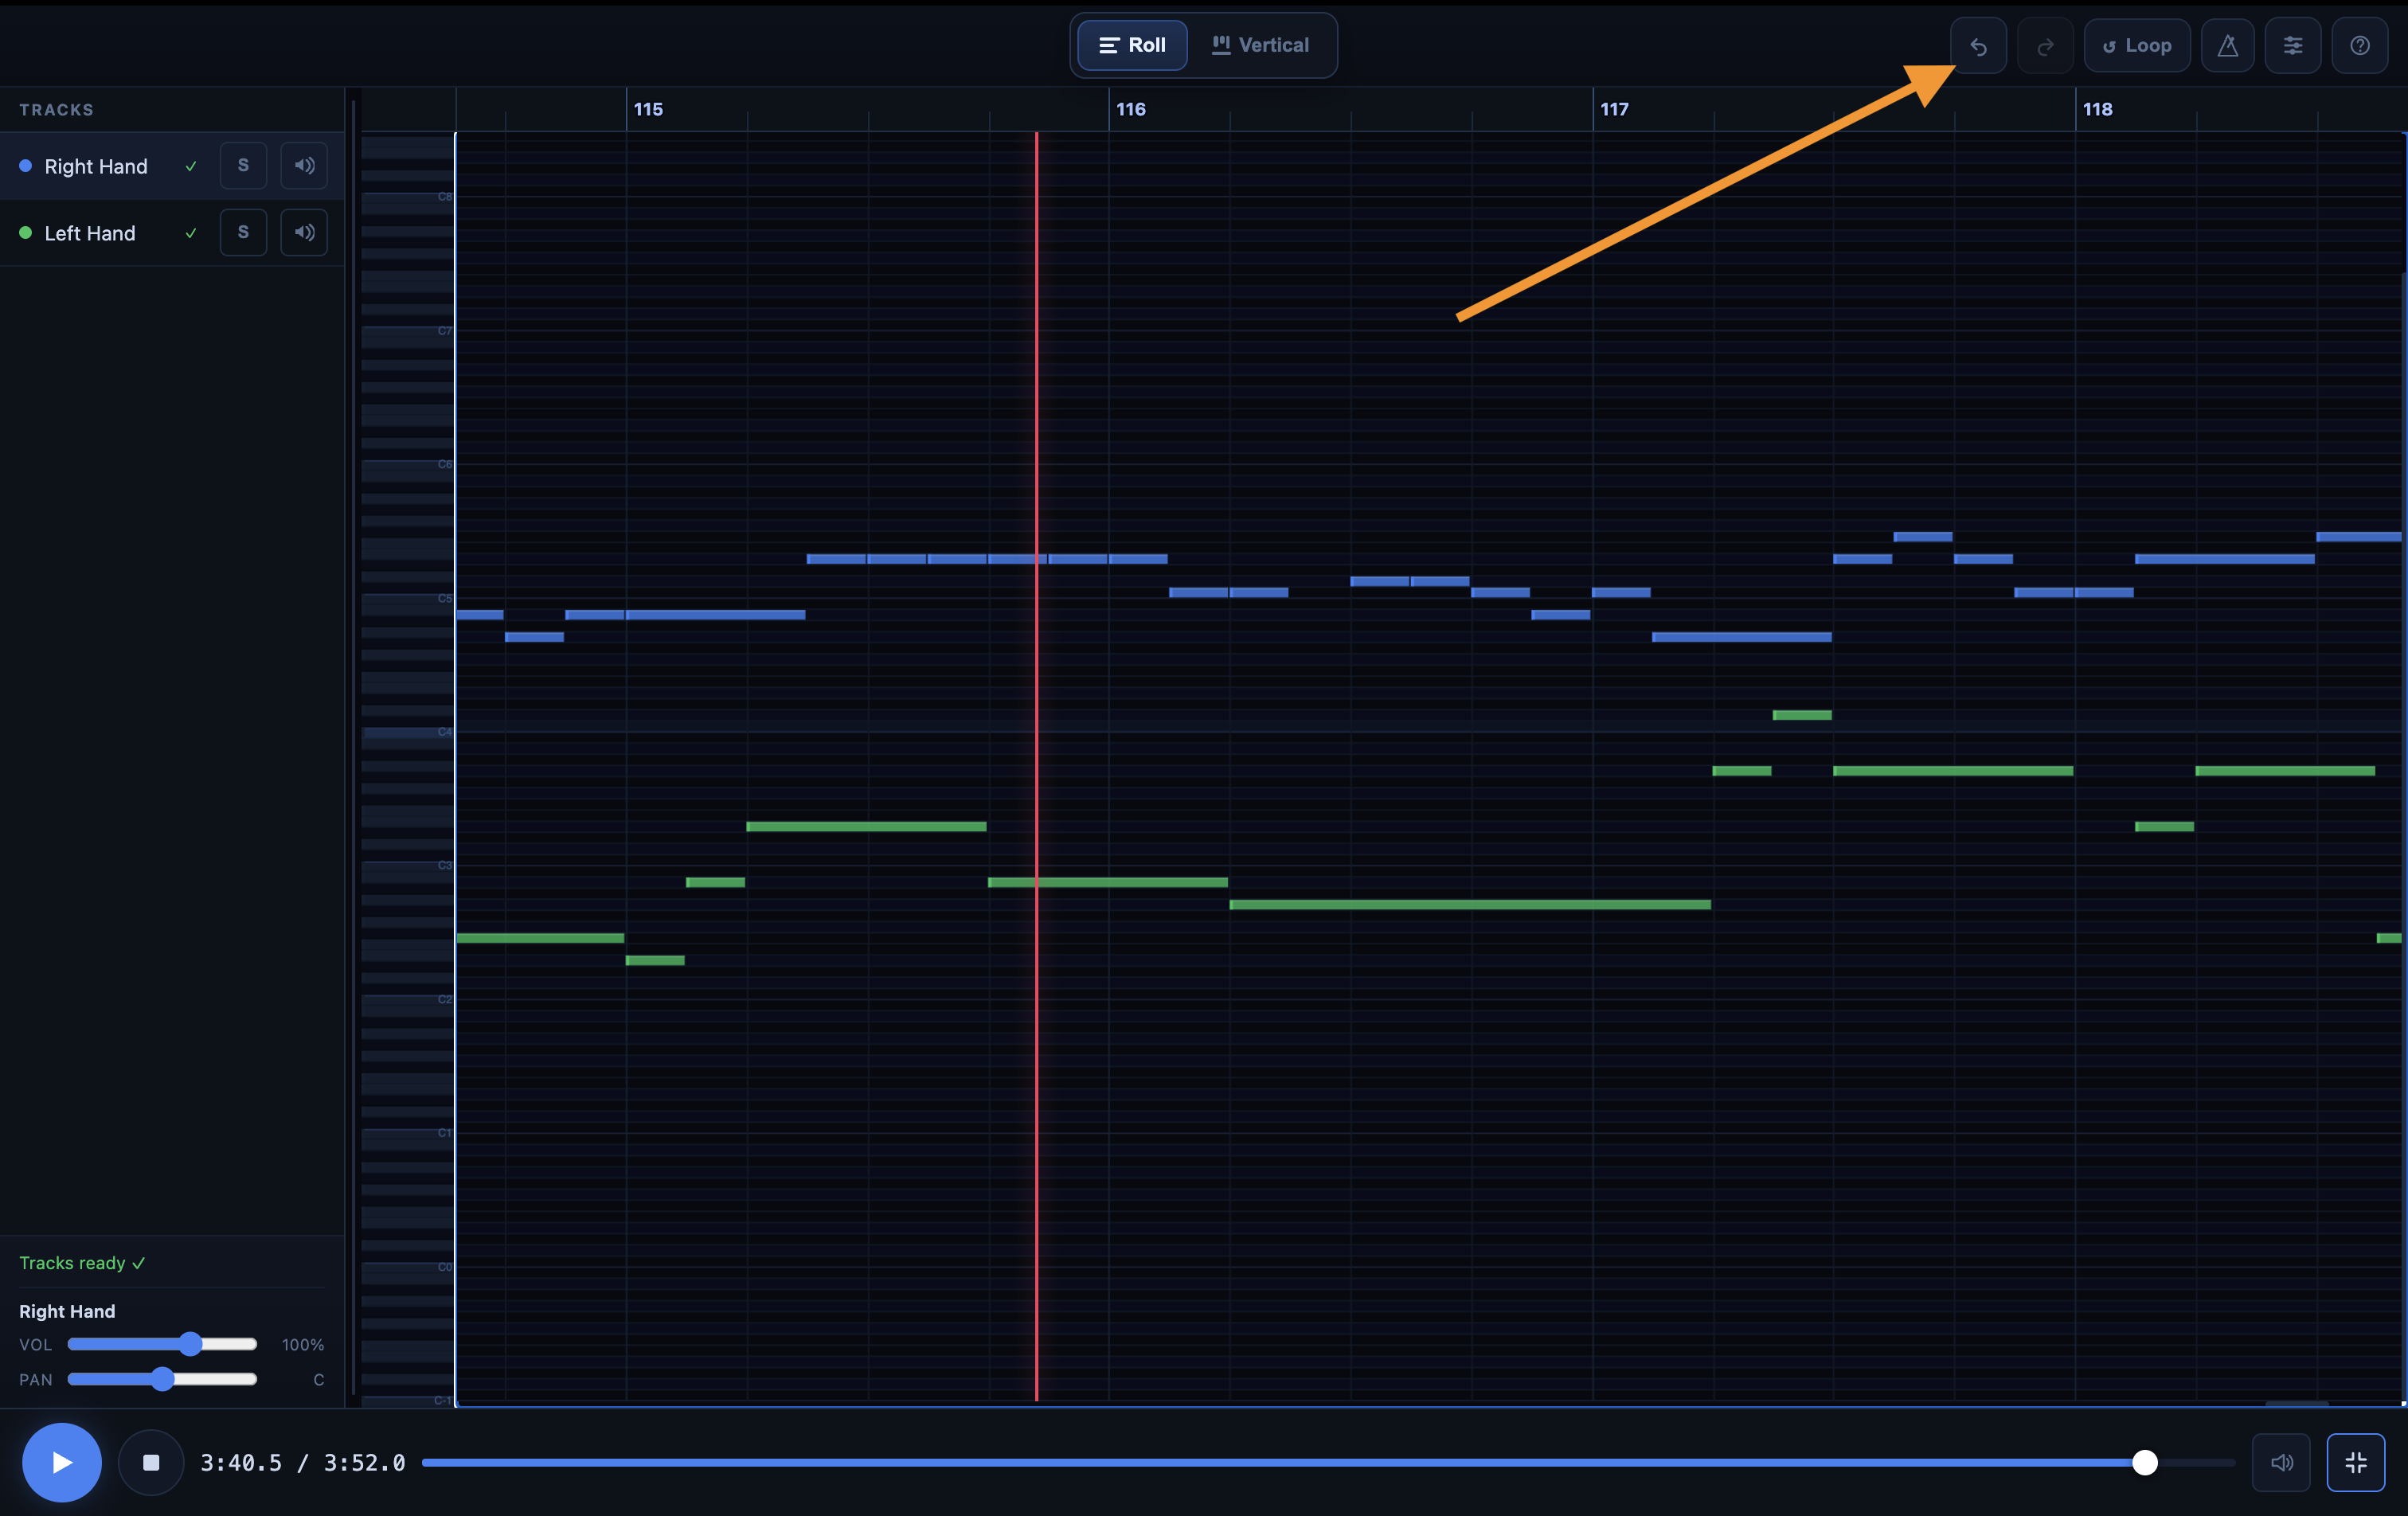
Similarly, after undoing an action, you can click the "Redo" button located right next to the undo button to return to the version prior to your undo (or press Cmd/Ctrl + Shift + Z on your computer keyboard):
4) How to Read the Piano Roll Effectively
In the Roll view, each note appears as a block. Its horizontal position indicates when it is played. Its length indicates its duration. Its vertical position indicates its pitch.
This representation is very useful because it allows you to spot certain problems immediately. A note that is too short is immediately obvious. A note that’s too long is too. A note that’s out of sync or placed too high or too low is often easier to spot here than on a traditional score.
In other words, the Piano Roll transforms MIDI into something very visual. That’s precisely what makes it so useful for editing.
5) Why Zooming Is So Important
Zooming is one of the most useful tools in the Piano Roll. When a passage contains many notes, it becomes difficult to select exactly the right one without enlarging the view.
The right approach is therefore simple: zoom in first, then correct.
The more you zoom in, the more precise the editing becomes. This is particularly true in fast passages, tight chords, or areas where many notes overlap.
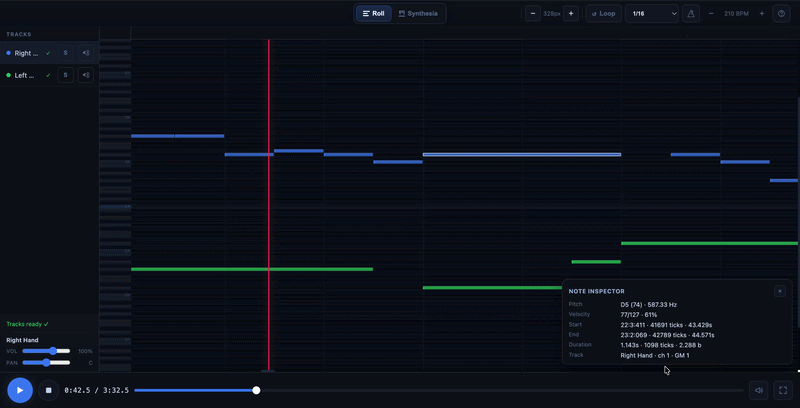
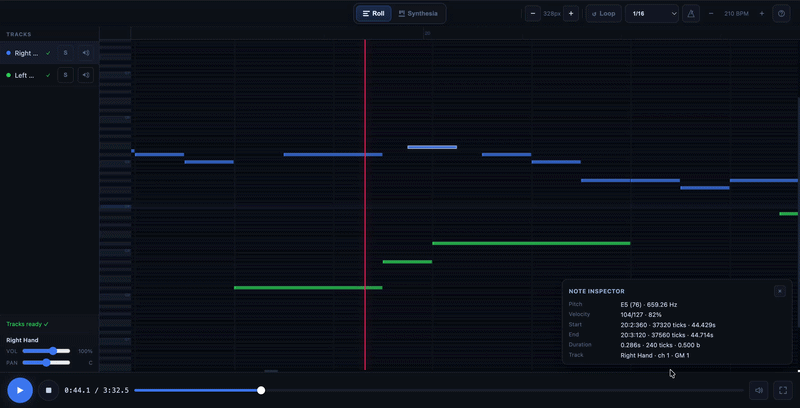
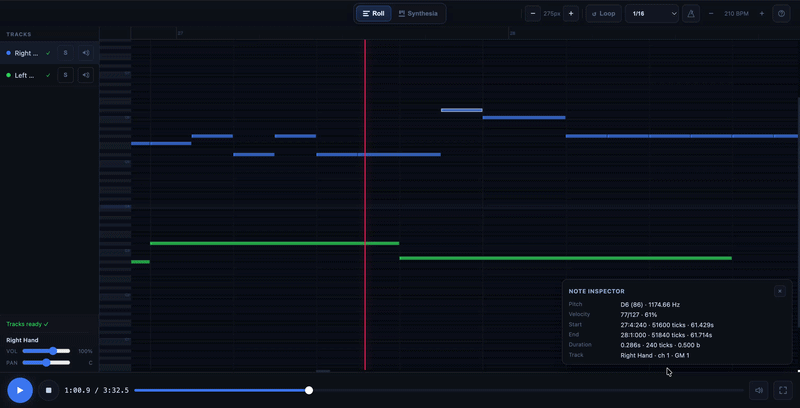
6) Click on a note to inspect it
When you click on a note, the Piano Roll can display its information. This allows you to see its pitch, velocity, position in time, duration, and the track it belongs to. The inspector can also display more detailed musical information, such as the measure, time signature, or MIDI ticks.
This step is very useful when several notes are close together and you want to be sure you’re editing the right one. Before moving or deleting a note, it’s best to select it properly and verify that it’s the one you intended.
7) Editing a Note in the Roll View
The Roll View allows you to edit MIDI data directly. This is where the Piano Roll really comes in handy after a conversion.
7.1 Moving a Note
You can move a note by dragging it. If you move it to the left or right, you change its position in time. If you move it up or down, you change its pitch.
This is the most common type of correction. It allows you to correct a note that is too early, too late, too low, or too high.
7.2 Changing the Duration
You can change the duration of a note by dragging its left or right edge.
This allows you to shorten or lengthen it. This is very useful when the transcription is generally correct, but a note ends too early or lasts too long.

7.3 Add a note
If a note is missing, you can create one directly in an empty area.
The most useful commands are:
- Double-click in an empty area: create a note
- Alt + click in an empty area: create a note directly
7.4 Deleting a note
If a note is incorrect or unnecessary, you can delete it immediately.
The most useful shortcuts are:
- Delete
- Backspace
- Right-click > Delete
7.5 Adjusting Velocity
Velocity determines the intensity of a note. It can be useful if you want to make a passage sound more natural, soften an attack that’s too strong, or balance a phrase.
On a computer:
- Right-click and drag vertically: adjust the velocity
On a mobile device or tablet:
- Long-press a note: enter velocity edit mode
8) Working with Multiple Notes at Once
The Piano Roll isn’t just for editing notes one by one. You can also select multiple notes at the same time. This is very useful for moving an entire group, deleting a pattern, or duplicating a section.
8.1 Multiple Selection
On a computer, Cmd + click on Mac or Ctrl + click on Windows allows you to add or remove a note from the selection. You can also draw a selection frame by clicking in an empty area and then dragging the mouse.
8.2 Why This Is Useful
As soon as a group of notes is selected, editing actions apply to the entire group. This allows you to correct a repetitive passage, a chord, or an entire phrase more quickly.
9) Copy, Paste, Duplicate, Undo
The Piano Roll includes the most useful shortcuts from a traditional editor. These are often the ones that save the most time on a daily basis.
9.1 For editing
- Delete or Backspace: delete
- Cmd/Ctrl + X: cut
- Cmd/Ctrl + C: copy
- Cmd/Ctrl + V: paste
- Cmd/Ctrl + D: duplicate
- Alt + drag: duplicate while moving
9.2 Undo
- Cmd/Ctrl + Z: Undo
- Cmd/Ctrl + Shift + Z: Redo
Once you’ve mastered these shortcuts, your workflow becomes much smoother.
10) Snap: What It’s Really For
Snap is used to align your notes on a rhythmic grid. When enabled, notes you create, move, resize, or paste automatically snap to this grid.
This is very useful because it prevents small, almost invisible misalignments that are annoying to listen to. Snap works while editing. It does not automatically re-correct all the notes in the song at once.
10.1 Which setting to choose
In most cases, 1/16 is an excellent default setting. If you’re working on a simple passage, 1/8 may suffice. If you’re working on something faster or more intricate, 1/32 can be useful. The Off mode completely disables this feature.
10.2 Temporary Free Adjustment
If you want to make a more precise adjustment without turning off Snap, you can hold down Shift while moving. This temporarily bypasses the grid.
11) The A/B Loop: The Most Useful Feature for Editing
The A/B Loop lets you loop a specific section of the track. It’s probably the most useful feature for working efficiently.
11.1 Why It’s So Useful
Instead of restarting the entire playback every time, you can isolate a small section, listen to it several times, make a correction, and then listen to it again immediately. It’s much faster, more precise, and less tiring.
11.2 When to Use It
Looping is particularly useful:
- when a measure is off-beat
- when a note seems out of place
- when a passage is fast
- when you want to compare before and after a correction
11.3 Useful shortcuts
- L: turn looping on/off
- [: start of loop
- ]: end of loop
12) Tracks: what they’re for in the Piano Roll
If your MIDI contains multiple tracks, the Piano Roll lets you manage them separately. This is very helpful for understanding what you hear and isolating the source of an error.
12.1 Mute, Solo, Volume, Pan
You can mute a track, isolate one, or adjust its volume or pan. This allows you to focus on a single part of the song when the overall mix is too dense.

12.2 The Right Approach
If you’re having trouble understanding a section, start by listening to one track at a time. This is often the quickest way to pinpoint an error.
13) Your changes are saved automatically
When you edit a note in the Piano Roll, your changes are saved automatically. So you don’t need to click a “Save” button after every correction. The Piano Roll was specifically designed to let you correct, listen, and then continue without interrupting your workflow.
13.1 What You See During Saving
Depending on the status of your edit, an indicator may appear in the interface. For example, you might see:
- Ready
- Saving…
- Saved
- Error
In practical terms, this means that the Piano Roll tells you whether your latest change is still being saved, has already been saved, or if something prevented the save.
13.2 What this means for you
Under normal use, you can work simply:
- you make a correction;
- you let the tool process the change;
- you restart playback to check;
- you continue.
In other words, you don’t have to interrupt your work to “save manually” after every note.
13.3 What to do if you see an error message
If the interface indicates an error, the simplest solution is to avoid making too many changes at once. First check if the page is responding normally, then try making a small correction. If necessary, reloading the page can help you start over cleanly.
The important point to remember is this: under normal operation, your corrections are saved automatically. You can therefore focus on the music, not on saving.
14) Return to the score
Once you’ve finished your corrections in the Piano Roll, return to the Score view. This allows you to check the musical readability, the overall rendering, and the final result before downloading.
The Piano Roll is excellent for correcting MIDI. The score remains ideal for validating the final rendering. As intended, the score should realign with the latest version of the MIDI when you return to this view or when you download the updated MusicXML.
15) Useful keyboard shortcuts on a computer and touch gestures on mobile devices
The Piano Roll can be controlled in two ways, depending on your device.
On a computer, you can work much faster using keyboard shortcuts and right-clicking.
On a phone or tablet, navigation relies mainly on touch gestures and the buttons visible in the interface.
15.1 On a computer: the most useful keyboard shortcuts
Here are the most useful shortcuts for working faster in the Piano Roll.
Playback and navigation
- Space: play / pause
- S: stop and return to the beginning
- M: turn the metronome on / off
- L: turn the A/B loop on / off
- [: set or adjust the start of the loop
- ] : set or adjust the end of the loop
- F: switch to full screen / exit full screen
- ←: rewind 5 seconds
- →: fast-forward 5 seconds
Selection and editing
- Cmd + click on Mac / Ctrl + click on Windows: add or remove a note from the selection
- double-click in an empty area: create a note
- Alt + click in an empty area: create a note directly
- Alt + drag: duplicate a note or selection while moving it
- Shift while moving: temporarily bypass Snap for finer adjustment
Cut, copy, paste, delete
- Delete or Backspace: delete the active selection
- Cmd/Ctrl + X: cut
- Cmd/Ctrl + C: copy
- Cmd/Ctrl + V: paste
- Cmd/Ctrl + D: duplicate
Undo and Redo
- Cmd/Ctrl + Z: undo
- Cmd/Ctrl + Shift + Z: redo
Change the track of a note or selection
If your MIDI contains multiple tracks, you can also move a note or selection to another track using the keyboard:
- Cmd/Ctrl + Shift + ↑
- Cmd/Ctrl + Shift + ↓
If there are 2 tracks, the shortcut switches directly to the other track.
If there are more than 2 tracks, it cycles through the previous and next tracks.
Zoom
To zoom in the Roll view, you can:
- use the Zoom - / + buttons
- use Ctrl + scroll wheel / trackpad on a computer
15.2 On a computer: right-clicking is also very useful
Right-clicking opens a very handy context menu without using the keyboard.
Right-click on a note
You can, in particular:
- cut
- copy
- paste
- duplicate
- delete
- select the notes on the track
- change the selected note’s track
Right-click in an empty area
You can:
- paste at the clicked location
- add a note exactly at that location
This is a great alternative if you prefer working with the mouse rather than the keyboard.
15.3 On a phone or tablet: the most useful gestures
On mobile and tablet, the Piano Roll has been designed to remain usable without a keyboard. In this case, the most reliable way to edit is generally note by note.
Listen and navigate
- Use Play / Pause to start or stop the track
- Tap or swipe the progress bar to jump directly to a section
- In the canvas, a swipe lets you navigate the view without accidentally changing the notes
- In the Roll view, you can pinch the screen to zoom
Selecting a note
- Tap a note to select it
- This also opens a compact inspector
- On mobile, once the note is selected, a directional pad may appear to move the note in small steps to the left, right, up, or down
Move a note
- You can drag the note directly to adjust its position in time or its pitch
- You can also use the arrows on the directional pad for smoother and more precise adjustments on mobile/tablet
Adjusting a note’s duration
- Drag the left edge or the right edge of the note to shorten or lengthen it
Opening quick actions
- Double-tap a note to open its quick actions, such as copy, duplicate, change track, or delete
- Double-tap an empty area to open quick actions at that location, including Add a note here
Adjust velocity
- On mobile or tablet, long-press a note to enter velocity editing mode
Undo or Redo
On phones and tablets, keyboard shortcuts are not the primary method. Simply use the Undo and Redo buttons visible in the interface to go back or redo an action.
15.4 The Right Approach for Your Device
On a computer, the most efficient approach is often to combine:
- keyboard shortcuts
- right-click
- zoom
- A/B loop
On a mobile device or tablet, the most efficient approach is often to:
- work note by note
- zoom in before making any fine corrections
- use the directional pad for small adjustments
- use double-tap to quickly access the right actions
16) Best practices for using the Piano Roll
The best advice is to work in small steps.
Make a correction, listen, then continue. This is much more reliable than changing a lot of things at once.
Always zoom in before correcting a dense section. Use the loop feature as soon as an area gives you trouble. Keep Snap enabled in most cases. Use keyboard shortcuts to work faster. And above all, always check the result by ear.
At the end, go back to the score. This is the best way to validate the final result.
17) Practical examples: how to correct the most common issues
This section is intentionally very practical. The idea is simple: if you recognize your problem in one of the cases below, you can correct it right away in the Piano Roll.
17.1 A note is correct, but too short
You hear the right note, but it cuts off too early. In this case, it’s often enough to extend its right edge. This is one of the simplest and most common corrections.
17.2 A note starts a little too early
You feel that it comes in slightly before the right moment. Move it gently to the right. Use Snap if you want to stay aligned with the grid. If you want a finer adjustment, hold Shift while moving.
17.3 A note starts a little too late
This is the opposite of the previous case. The note comes after the right moment. Move it slightly to the left, then play it back to check if the passage flows better.
17.4 A stray note has slipped into a clean passage
You have a passage that’s generally correct, but one note seems “out of place.” It often creates a slight dissonance or a messy effect. In this case, select it and then delete it with Delete or Backspace.
17.5 A chord contains a note that is a half-step off
This is a very common occurrence. The chord sounds almost right, but one note is slightly off. In this case, click on the offending note and move it up or down by one semitone. Then, listen to the chord again immediately. This type of quick correction often improves the sound significantly.
17.6 A note is much too loud and drowns out the others
Sometimes, the right note is there, in the right place, but it stands out too much. The passage then sounds unbalanced. In this case, adjust its velocity to soften it. On a computer, right-click and drag vertically. On a mobile device or tablet, use a long press.
17.7 A small group of notes needs to be moved together
Sometimes, it’s not a single note that’s the problem, but an entire short phrase. In this case, select the relevant notes together, then move them as a single block. This is much faster than correcting them one by one.
17.8 An entire measure needs to be checked multiple times
If a measure sounds off to you, enable an A/B loop on that section. Listen to it several times, make a correction, then immediately compare the before and after. This is the most effective way to improve without getting lost in the entire song.
17.9 You’ve made a correction, but the result is worse
This happens often, and it’s no big deal. If you don’t like the correction, undo it immediately with Cmd/Ctrl + Z, then try a different approach. The Piano Roll is designed precisely for quick testing without taking risks.
17.10 A section is too dense to grasp at a glance
When too many notes overlap, start by zooming in. If the track contains multiple tracks, isolate one with Solo. Only then should you make corrections.
Very often, the problem becomes simple as soon as you reduce the number of elements you’re listening to at the same time.
18) Downloading your files after editing
Once your edits are complete, you can retrieve your files as usual. Depending on the app you’re using, you’ll be able to download:
- the PDF
- the MIDI
- the MusicXML
- the tablature when available for the instrument in question
The right time to download is simple: when the result sounds good to you, and when the score looks correct to you.
19) What to Remember
The Piano Roll is the ideal tool for clearly seeing notes over time, listening to your MIDI, quickly correcting a note, a duration, or a rhythm, working on a specific passage on loop, and then returning to the score to validate the final result.
It’s there to save you time on the most useful corrections. However, it doesn’t replace your ear, your musical sense, or your judgment about what you really want to achieve. Used this way, it’s a very effective tool for transforming an already good transcription into a much cleaner, more accurate, and more usable result.
To go further
- Upload your files (PDF, MIDI, MusicXML) and find your conversions
- Edit your converted score with the La Touche Musicale editor
- Transcription vs. Melody/Arrangement: what’s the difference?
- Which app to choose based on your goal (piano, guitar, sax, vocals…)