This part is the one to learn your favorite music on the piano. You go there when you click on the "Learn" button in the center of the music image.
Let's now take a detailed look at all the features it offers.
Accuracy: all these features can be fully combined. You can therefore combine them to obtain a high-performance learning experience that is 100% personalized to your needs and your comfort.
Piano MIDI connection
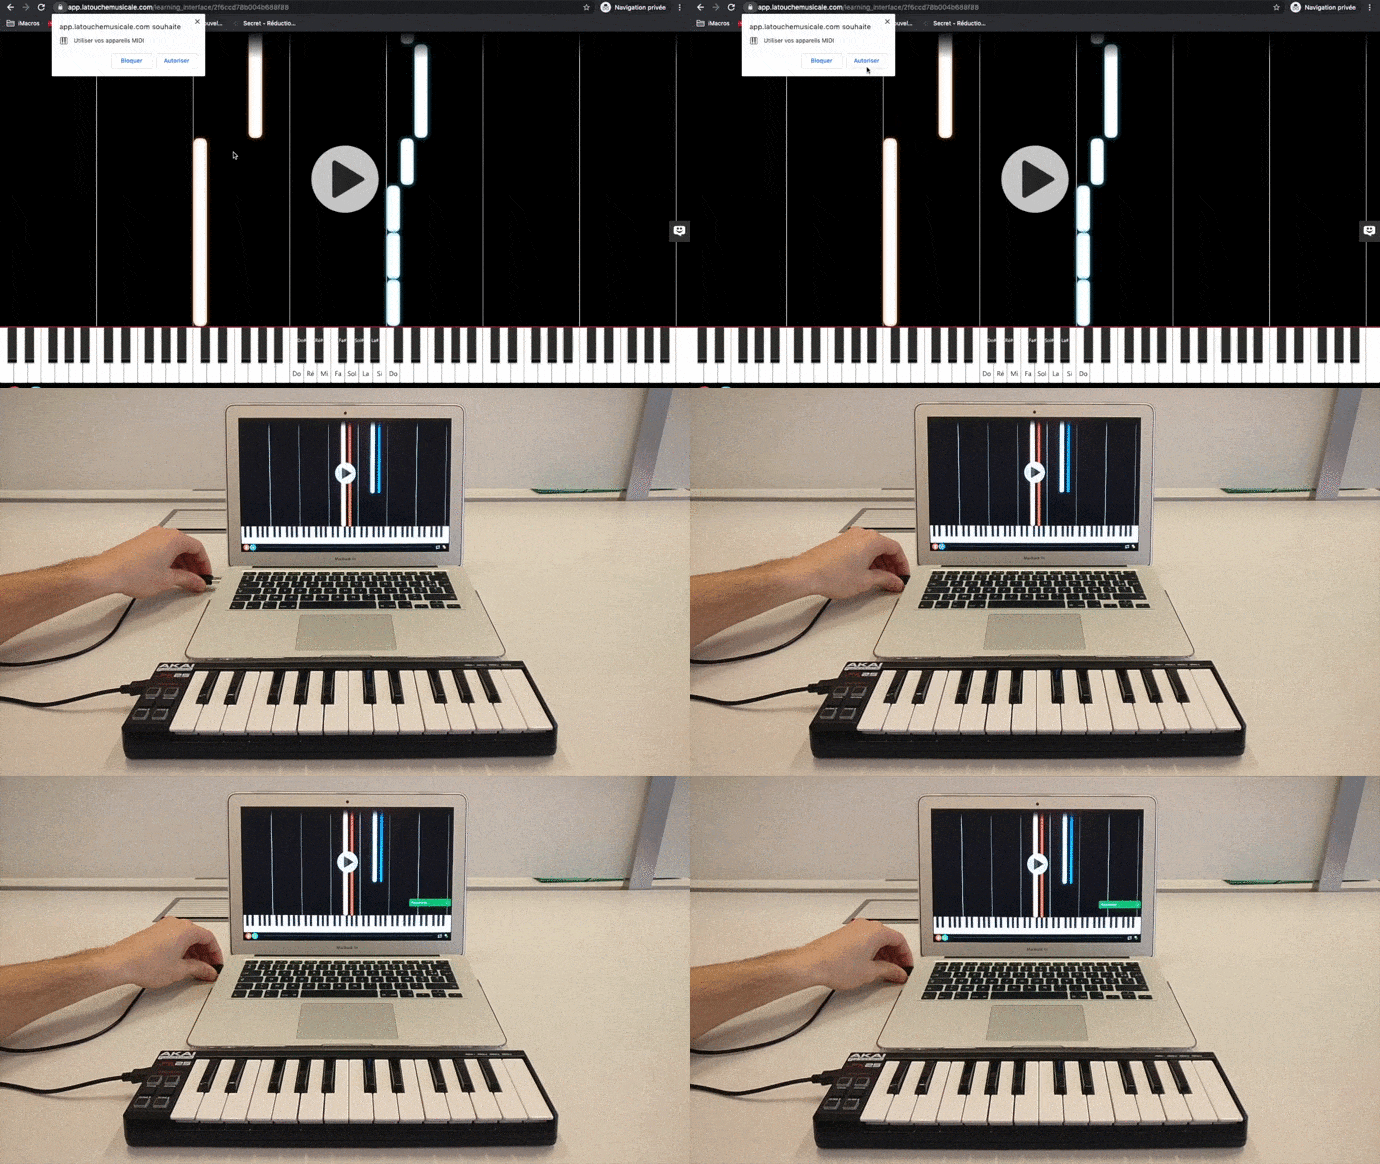
On the learning interface, you can connect your piano or synthesizer to your computer's USB port using a MIDI-USB cable.
This connection allows you to interact with the platform so you can learn at your own pace.
To connect your piano, first allow the midi device on your Google Chrome or Opera browser so that your piano can be recognized. Then connect your piano via your computer's USB port.
Learning modes
La Touche Musicale offers four learning modes to make it easy for you to learn music:
1 – The Learning Mode : This mode only works when you connect your piano via USB to your computer and it has been recognized by the platform.
Once this mode is activated, the music notes will automatically stop when they are to be played by the user. The music will not continue until you press the correct keys on your connected piano. When you press the correct keys, the tutorial will advance to the next notes, stop and wait for you to play them, and so on.
This learning mode, designed for beginners, allows you to progress at your own pace on the piece.
2 – The Start and Stop Mode : This mode only works when you connect your piano via USB to your computer and it has been recognized by the platform.
Once this mode is activated, the software will wait for you to press any key on your connected piano to advance. As long as you keep pressing a key on your piano, the tutorial will continue to progress. Release the key to stop the tutorial instantly.
With this mode, you can play at your own pace while putting more fluidity into your game than with the learning mode.
3 – The Play Mode : This mode is more akin to the function of a video. In this mode, by clicking on the "Play" button in the center of the interface, you can scroll through the notes of the music continuously. Press the pause button in the center of the interface to stop the tutorial.
Tip: use this mode when you have practiced enough on the music with the two previous modes (learning and start & stop). Also combine this mode with the scroll speed and loop speed features to make learning easier.
4 – The Expert Mode : This mode has the same operation as the Play mode, except that the notes of the music gradually disappear from the screen after a few seconds.
This mode allows you to check that you have mastered the music without getting attached to the visual. In this way, you can gradually detach yourself from the screen so that you can play your music in total autonomy.
Tip: Use this mode only after you have learned your music well with the other modes. Also pair this mode with the display of your results on the right side of the interface to check that you don't make any mistakes.
The Learning Loop
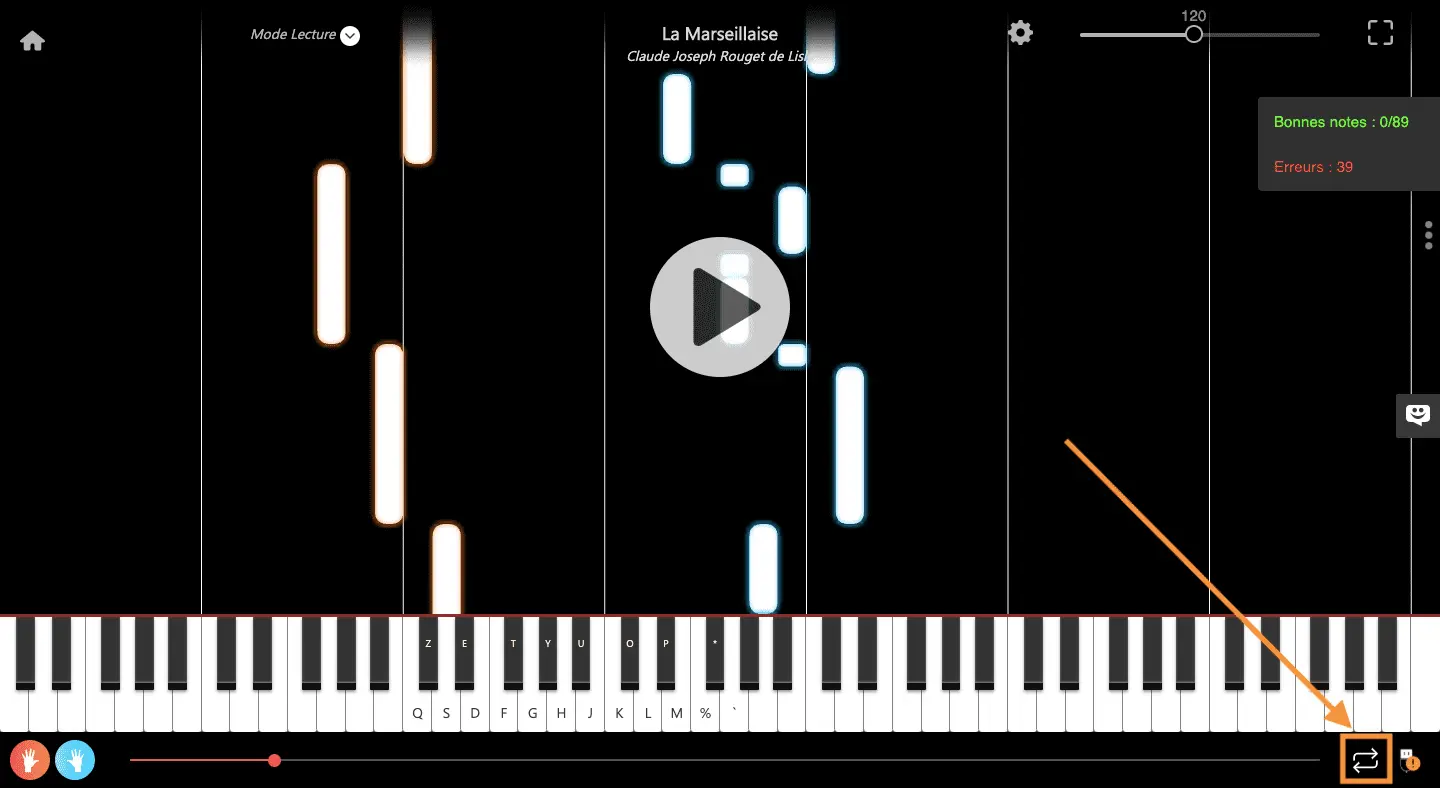
The loop allows you to choose a specific passage of music to play in a loop. Once the passage has been selected by the user, the repetition is done automatically, in any learning mode. Thanks to the loop, you will learn a part of the piece much faster.
To use this great feature, all you have to do is :

Click on the double arrow icon at the bottom right of the interface.
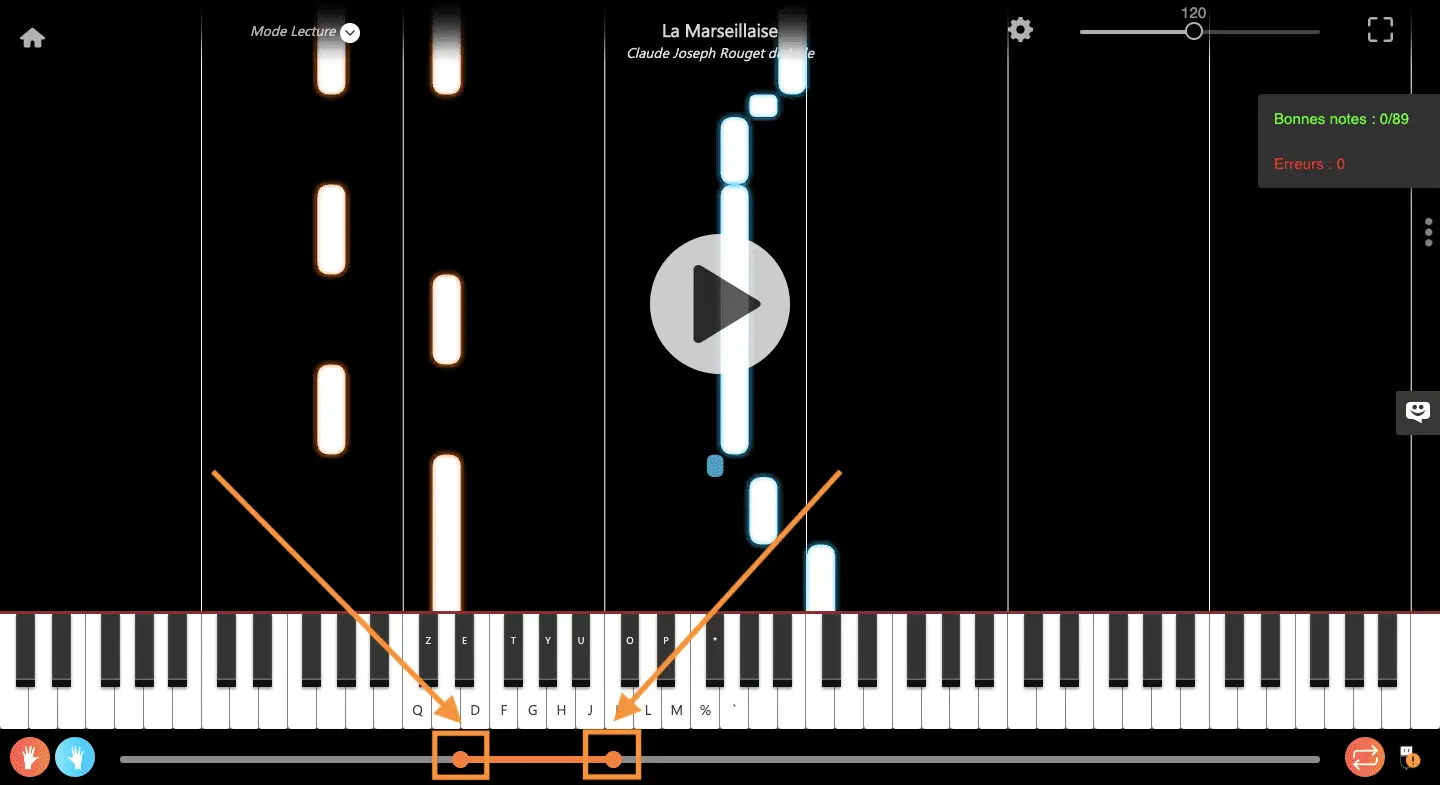

After clicking on the double arrow icon, the music progress bar turns orange and the single point that determined when you were in the music turns into two points, located on either side of the passage to be selected.

The point on the left represents the beginning of the passage of the music you wish to learn. The point on the right represents its end. Drag the dots to the left and right to precisely select the passage of the music you want to work on in a loop.
The speed of scrolling notes
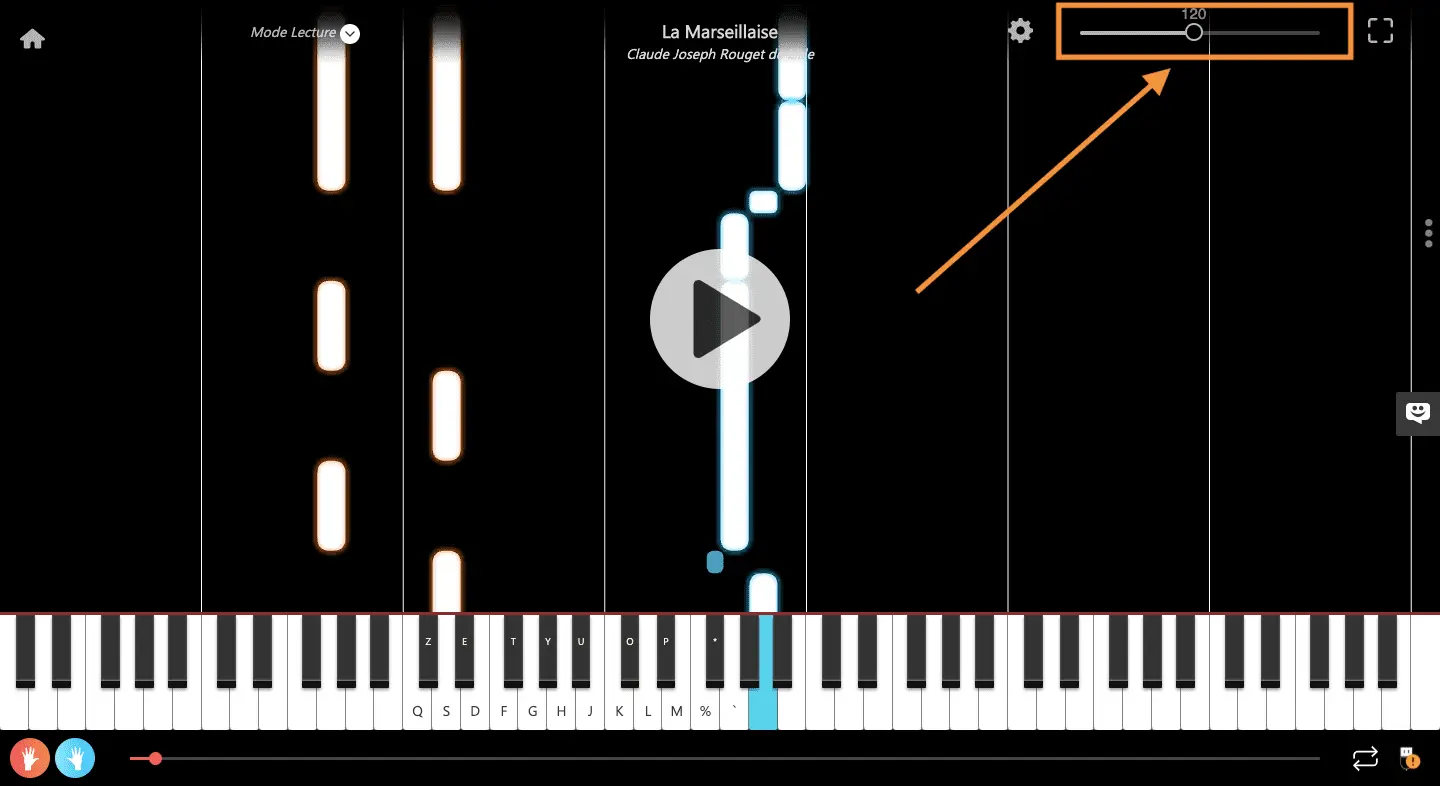
This feature allows you to fine-tune the speed at which the notes of the music will scroll across the screen. Simply move the slider to the left to decrease the speed or to the right to increase it.
Accuracy: When you play for the first time a music, the default speed is always that of the original music.
Always start a song with a low speed and gradually increase it when you feel comfortable.
This feature can of course be used in any learning mode.
The Hands
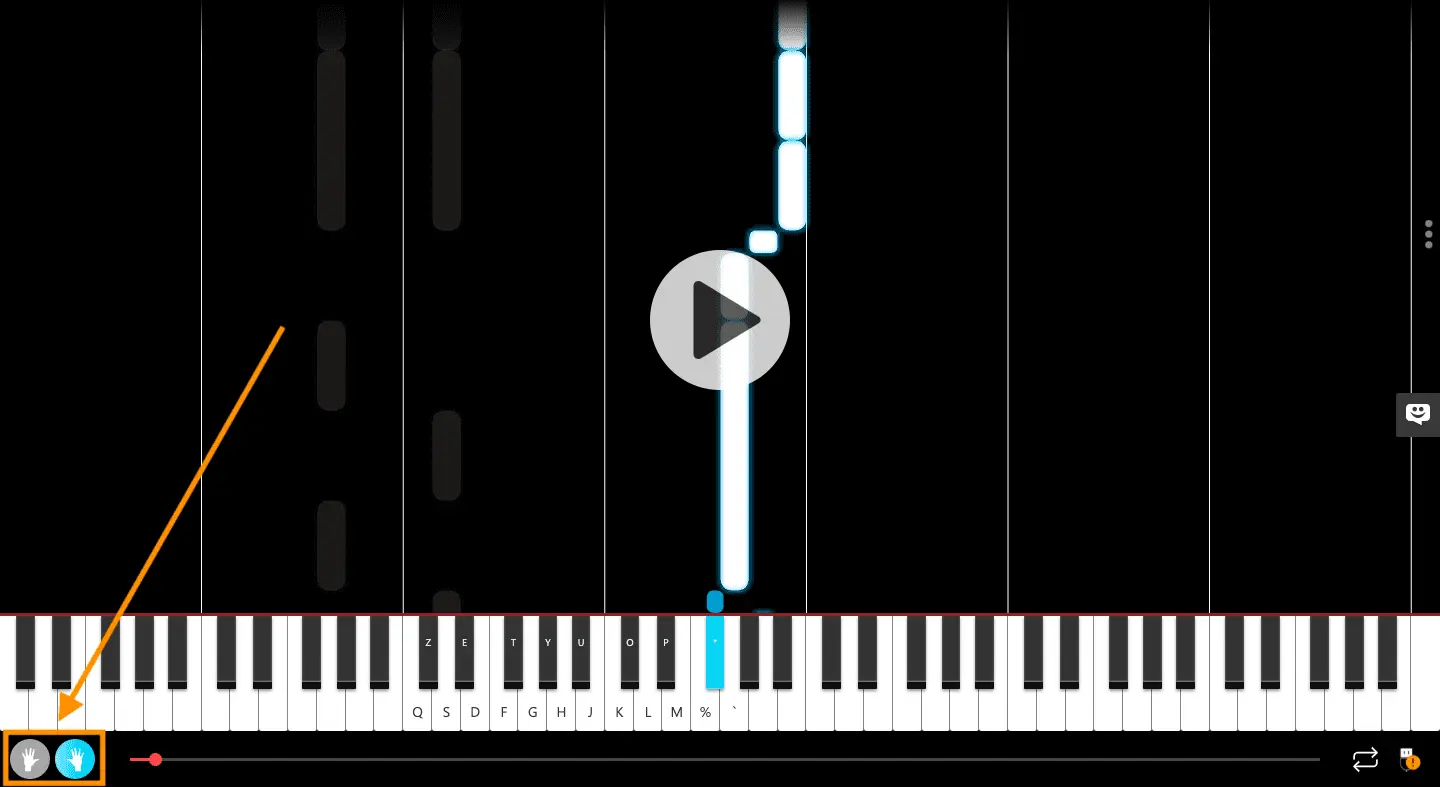
This feature allows you to choose which hand you want to focus on. By default, both hands are enabled. Click on one hand to turn it off and focus on the hand that remains on.
Tip: Work in passages with the buckle and learn one hand on the passage. Once you have mastered this hand, activate the other hand only. Finally, finish learning the passage by using both hands simultaneously.
Your game results in real time
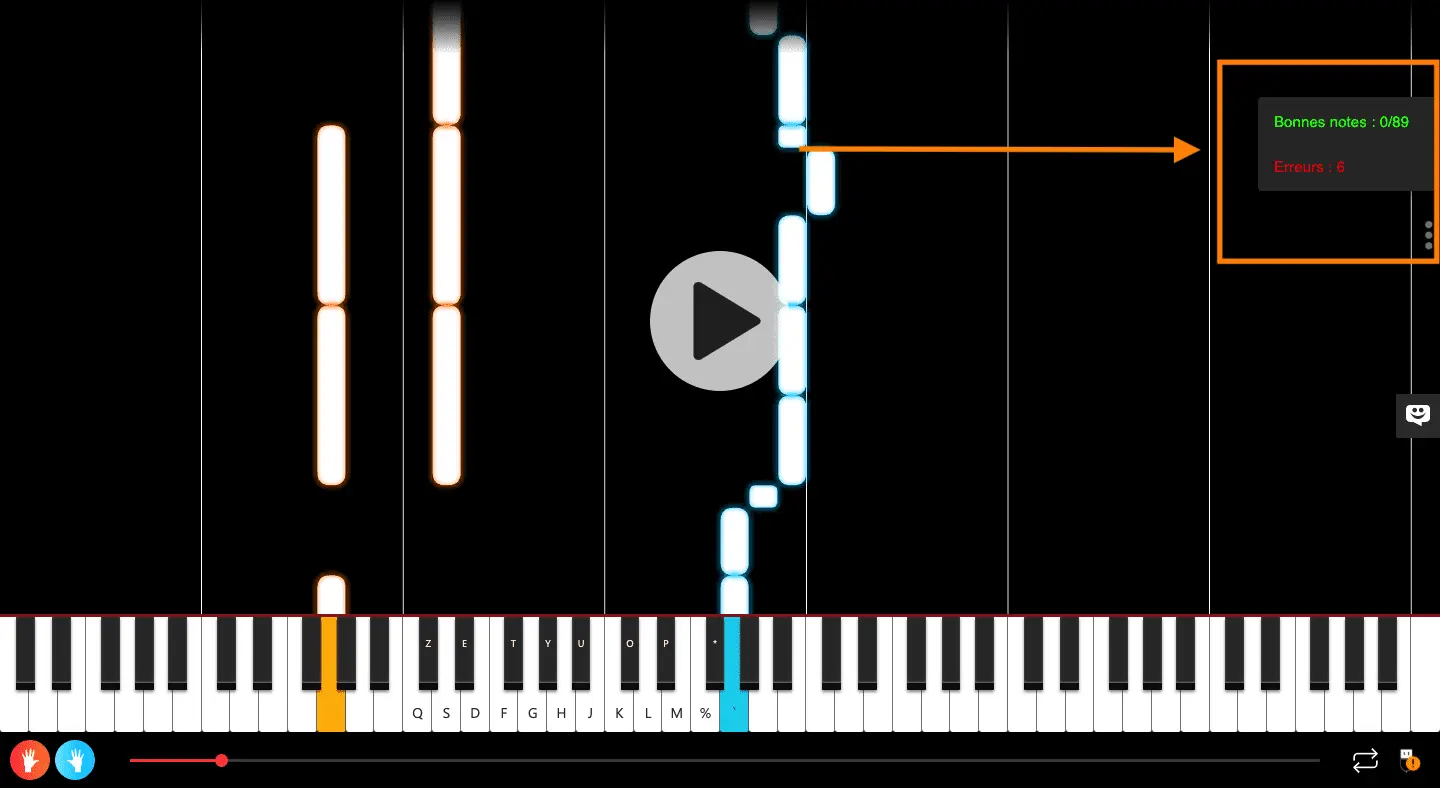
The dynamic display of your game results allows you to observe in real time the good scores and the mistakes you make. Use it to spot your mistakes and focus on them to improve quickly.
Accuracy: by default, the game results are displayed. You can decide to show or hide the results by clicking on the 3 small dots icon located on the right side of the interface, just below your results.
The display of the musical notation on the notes (C, D, E, ...)
On the learning interface, you can choose whether or not to display the note names (C, D, E, F, G, A, B) on the notes of the music. This possibility allows you to learn the musical notation and the placement of the different notes.
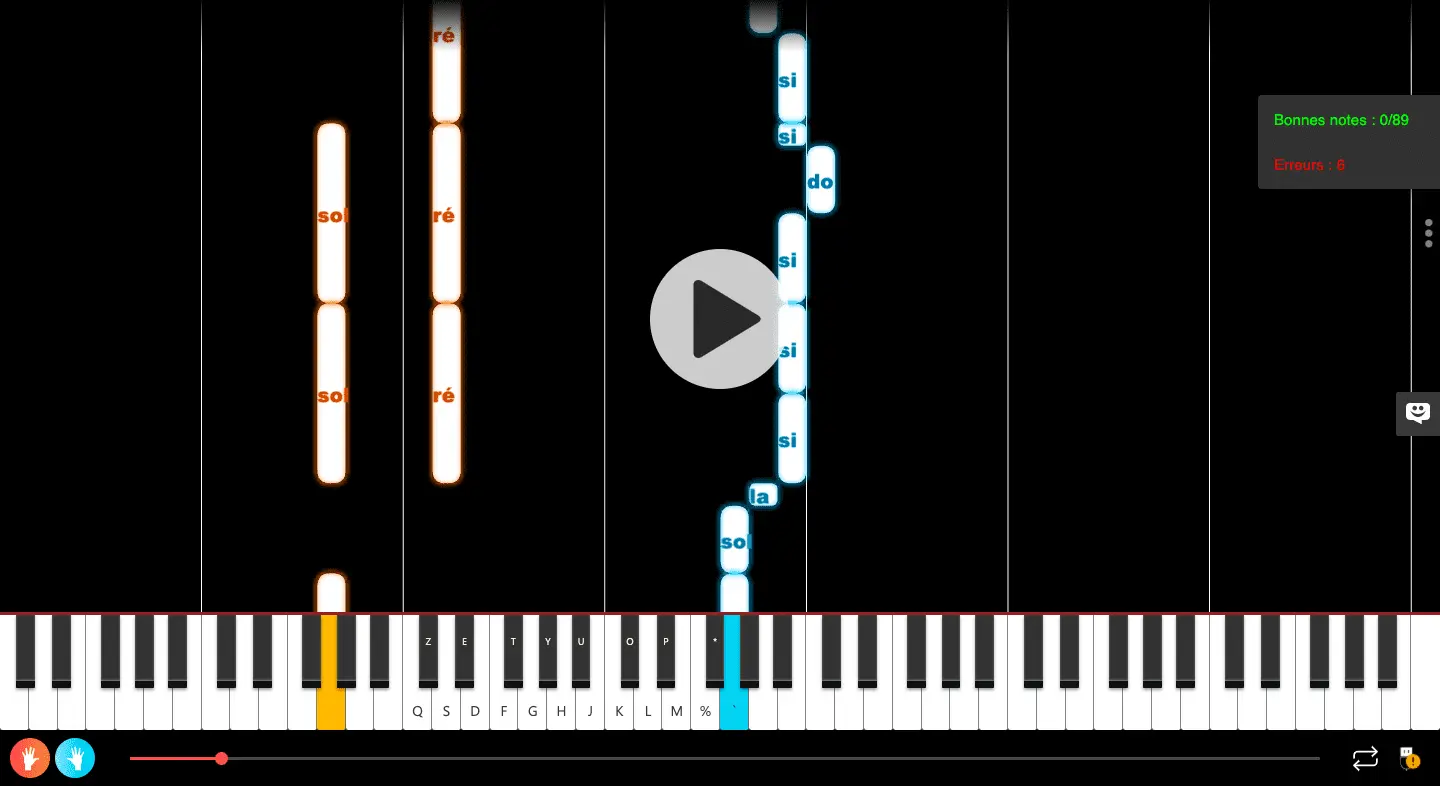
To activate the name of the musical notes, all you have to do is :

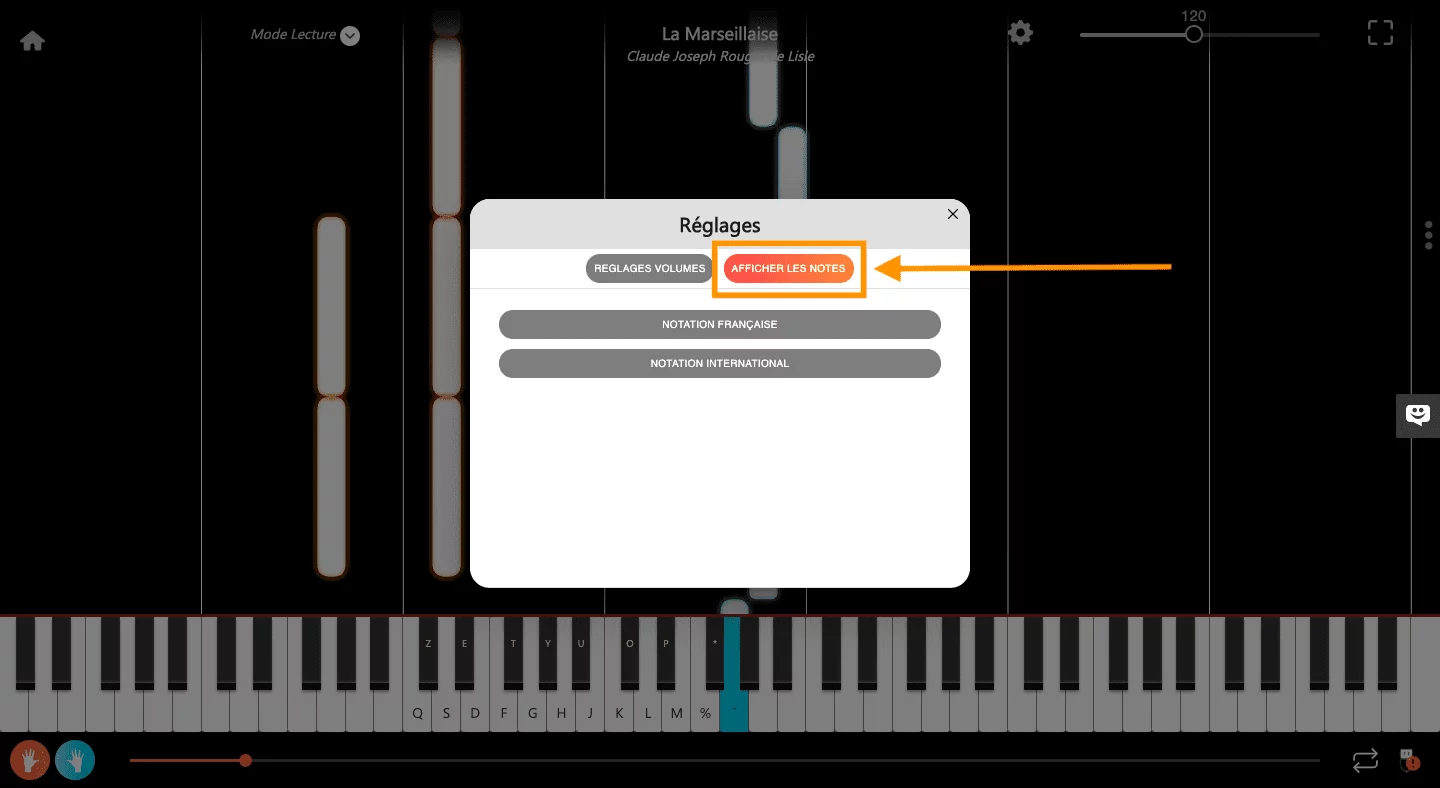
Click on the settings icon in the upper right corner of the interface.

A pop-up appears in the center of the interface: click on the "Show notes" button at the top of the pop-up.

Once in the "Display notes" section, you can choose to display either the French notation (C, D, E, ...) or the international notation (A, B, C, ...). Click on the notation you want to display, then close the pop-up. The name of the notes now appears on each note of the music.
